
Google Analytics
IWantTo.Review is a powerful tool to collect more (positive) reviews. The integration with Google Analytics allows you to collect data on the visitors to your IWantTo.Review page and use this data to gain additional insights and create targeted marketing campaigns on Google and social media.
It is especially useful for walk-in guests and allows you to “digitalize” them and turn them into loyal customers.
You can find this feature under Integrations in the left-side menu. Additionally, there is a link to Google Analytics in the Setup section of IWantTo.Review (scroll down to the bottom of the page).
As you have noticed, in the app you already have a Google Analytics report. It shows the number of distinct users who visited your IWantTo.Review page (Active Users) and the number of pages your users viewed (Screen Page Views) in the last 30 days. The report is available even if you didn’t add any tracking ID to your landing page. However, we recommend making use of the power that this data provides and follow the steps below.
1. Add a tracking ID
The first step is to add your own Google Analytics tracking code or Google Tag Manager container code to your IWantTo.Review page. Paste your Measurement ID (G-XXXXXXXXXX) or your GTM container ID (GTM-XXXXXX) in the field and click on the Save button. Here is where you can find your Measurement ID in Google Analytics or your container ID in Google Tag Manager.
![]()
Once you have added a tracking ID, set up cross-domain tracking to collect data from IWantTo.Review in the same data stream in your GA4. In the Admin section of your Google Analytics, go to Data Streams (under Data Collection and Modification in the Property Settings). Choose your web data stream and go to Configure tag settings. Then click on Configure your domains and add a condition: you should add both your domain and iwantto.review.
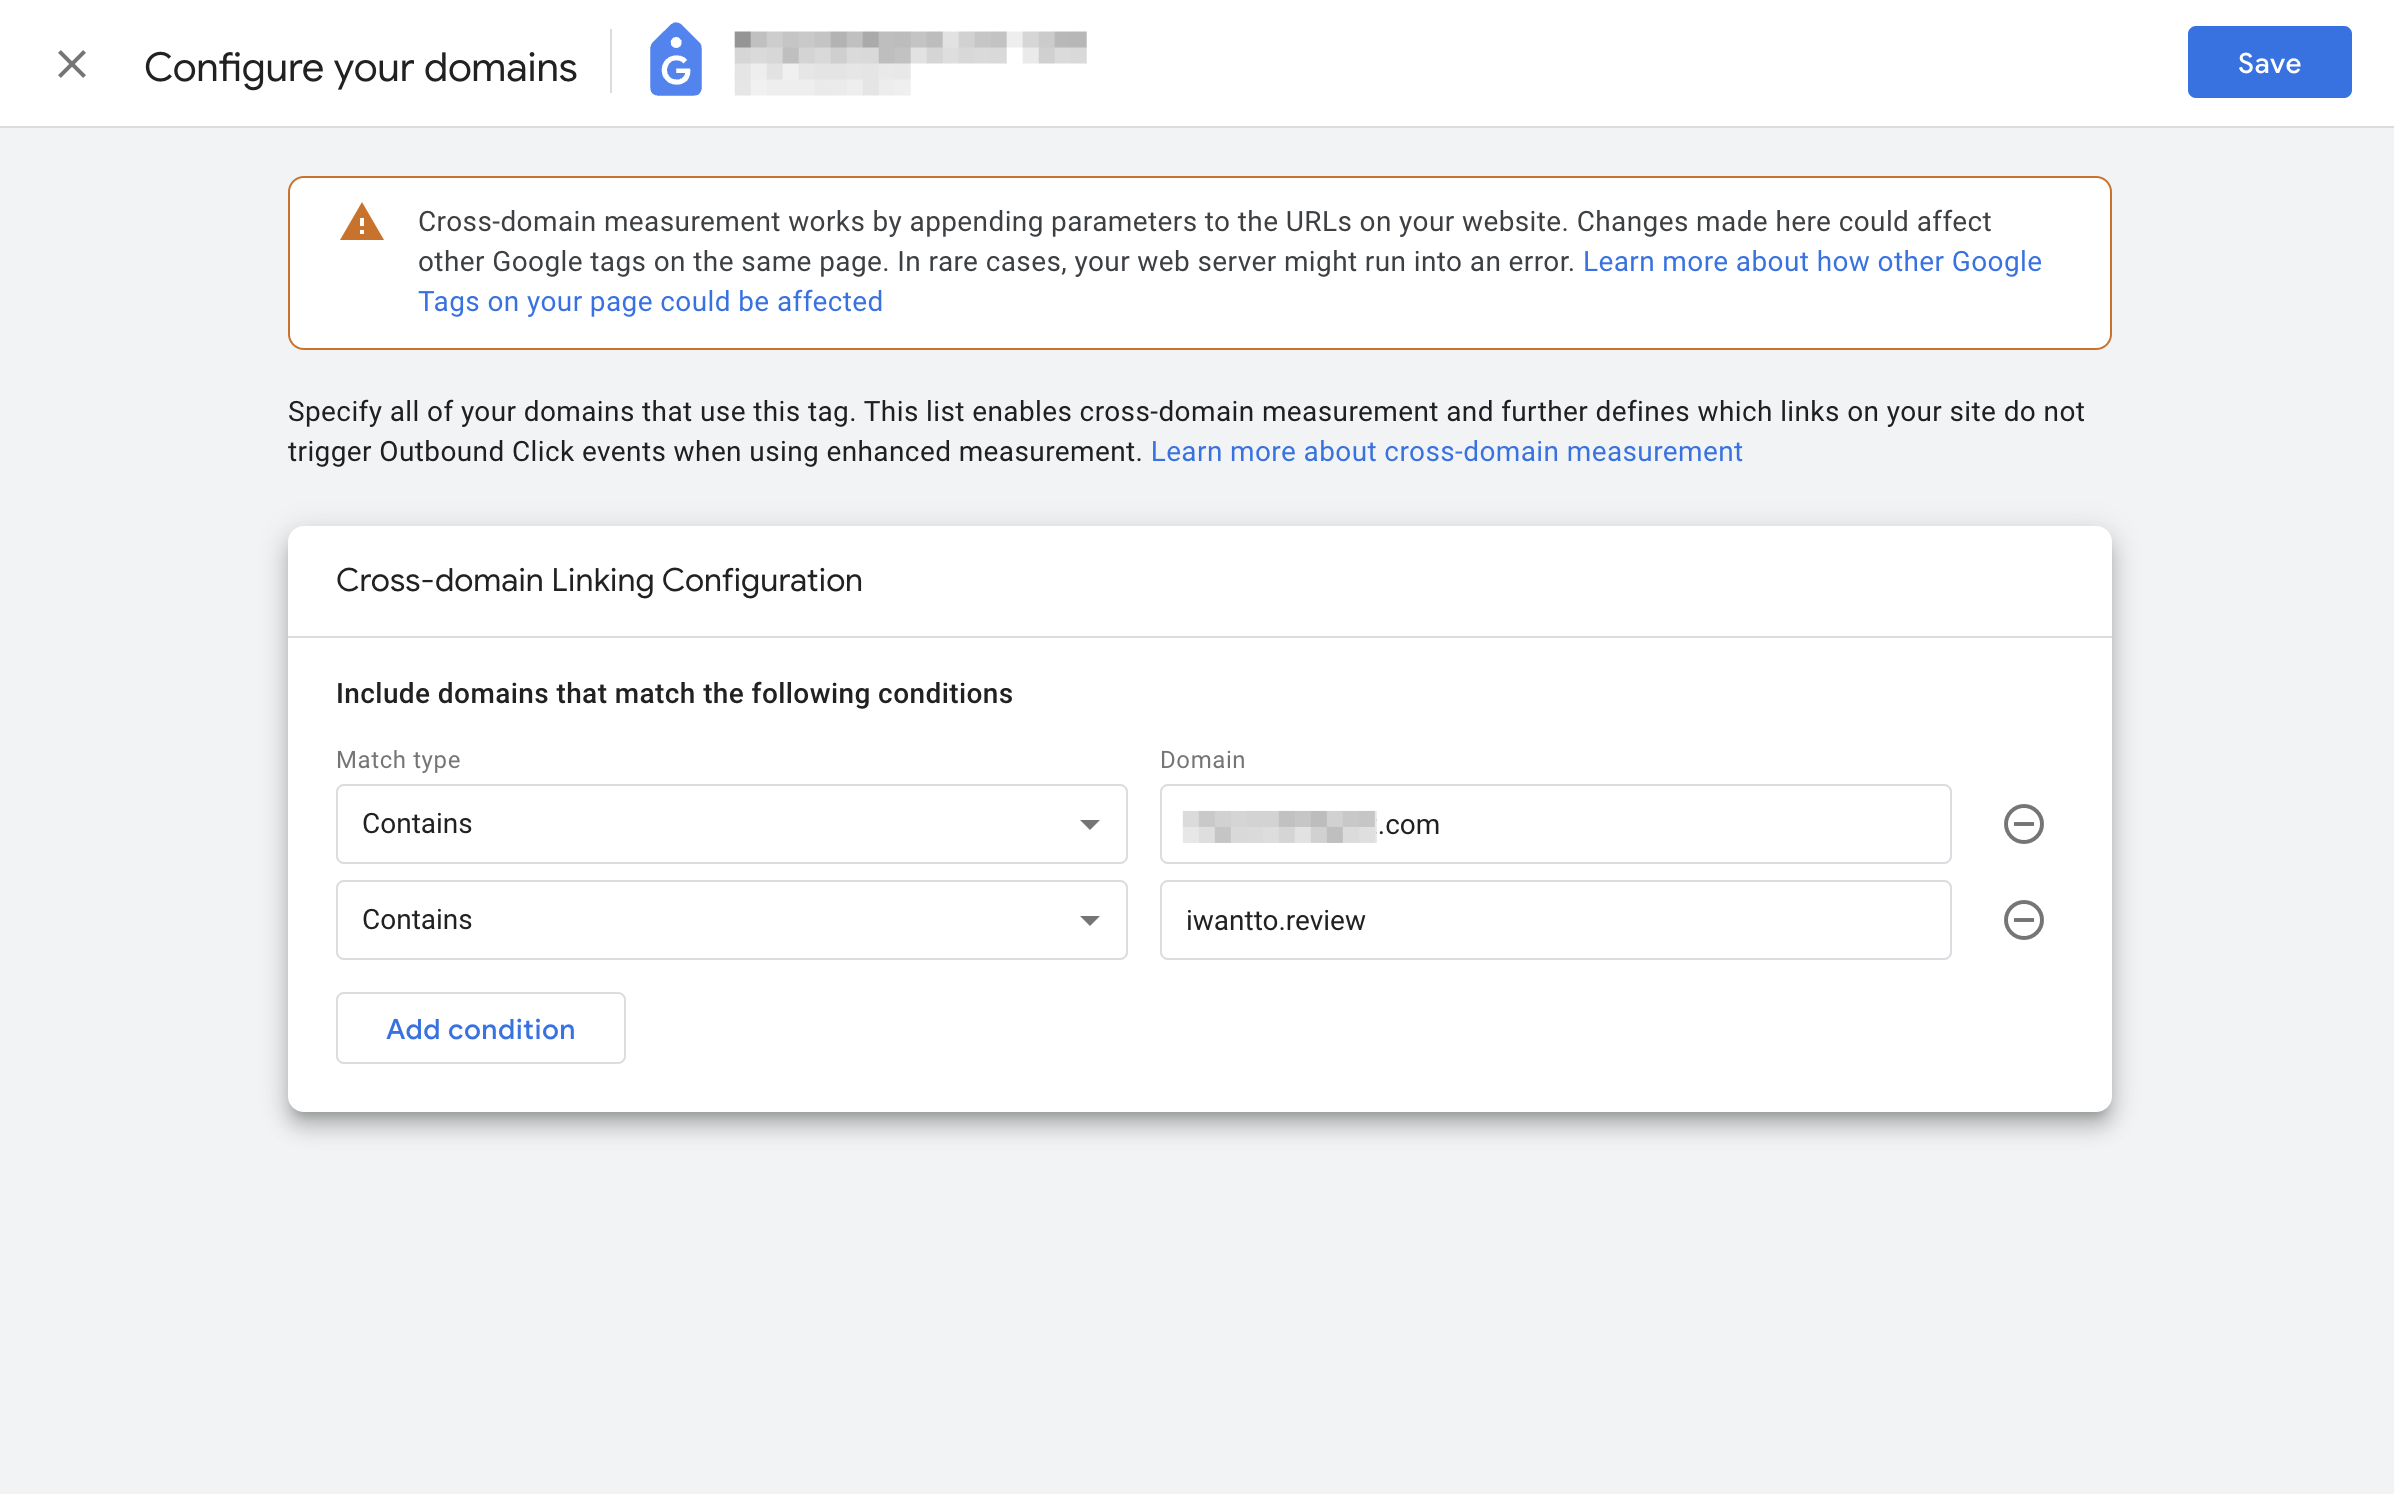
Similarly, we recommend configuring unwanted referrals. On the same page where you configured your domains, click on Show more and find List unwanted referrals. Add both domains and click Save.
2. Build audiences in Google Analytics
You have added your Google Analytics tracking code or your Google Tag Manager container code with Google Analytics installed to your IWantTo.Review landing page. Now, you can create an audience containing users who visit your page.
Go to the Admin section in your GA4 by clicking on the gear icon in the bottom left of the GA4 interface. Click Audiences in the Data Display section. Then click on the New Audience button and choose to create a custom audience. Here add a condition: Page path and screen class should contain your URL slug (for example, /respondelligent/). Click Apply, give your audience a distinctive name, such as “IWTR”, and save it.
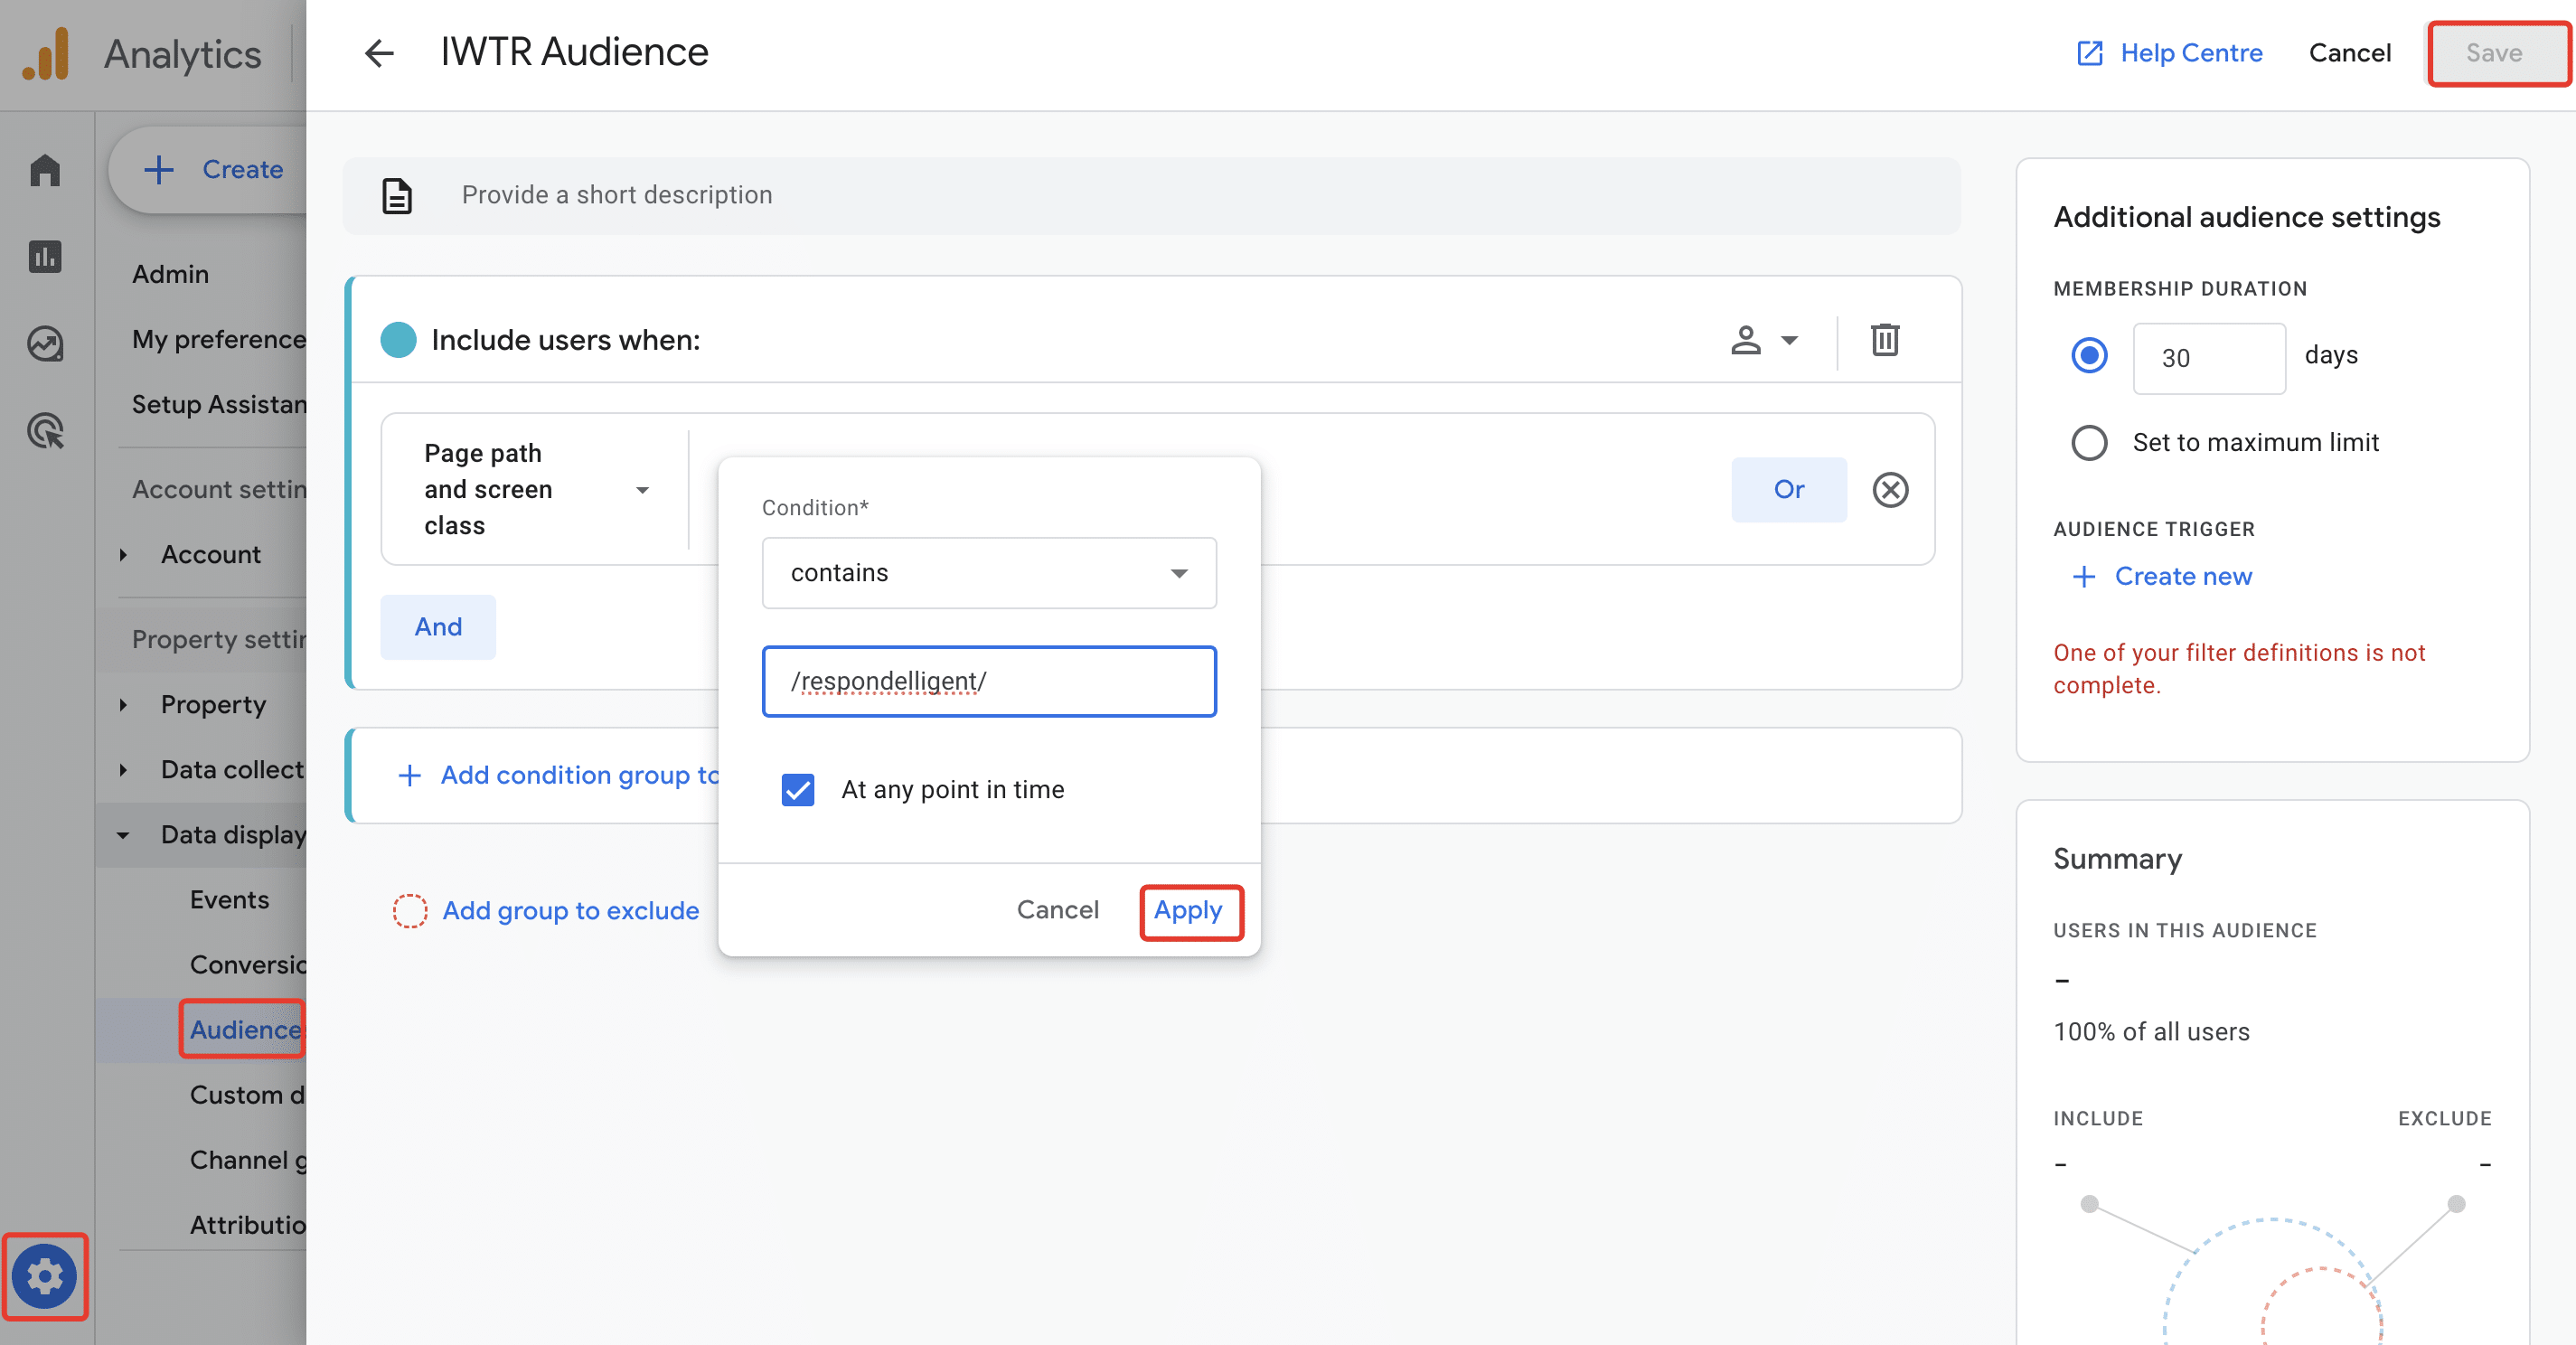
You will then see your new audience in the list. Please note that GA4 audiences are not retroactive. This means that they start collecting data only from the moment you create them.
3. Import your audience to Google Ads
You have created an audience in GA4 and now would like to use it in your Google Ads campaigns. First, make sure that your Google Analytics property is linked to your Google Ads account. Furthermore, you have to activate Google signals in your GA 4 settings. In the Admin section, go to Data collection in the Property settings and turn on Google signals data collection.
The audiences created in Google Analytics are automatically imported to Google Ads. In your Google Ads account, go to Tools and settings and select Audience Manager under Shared Library. You will see a list of all your audiences under your data segments.
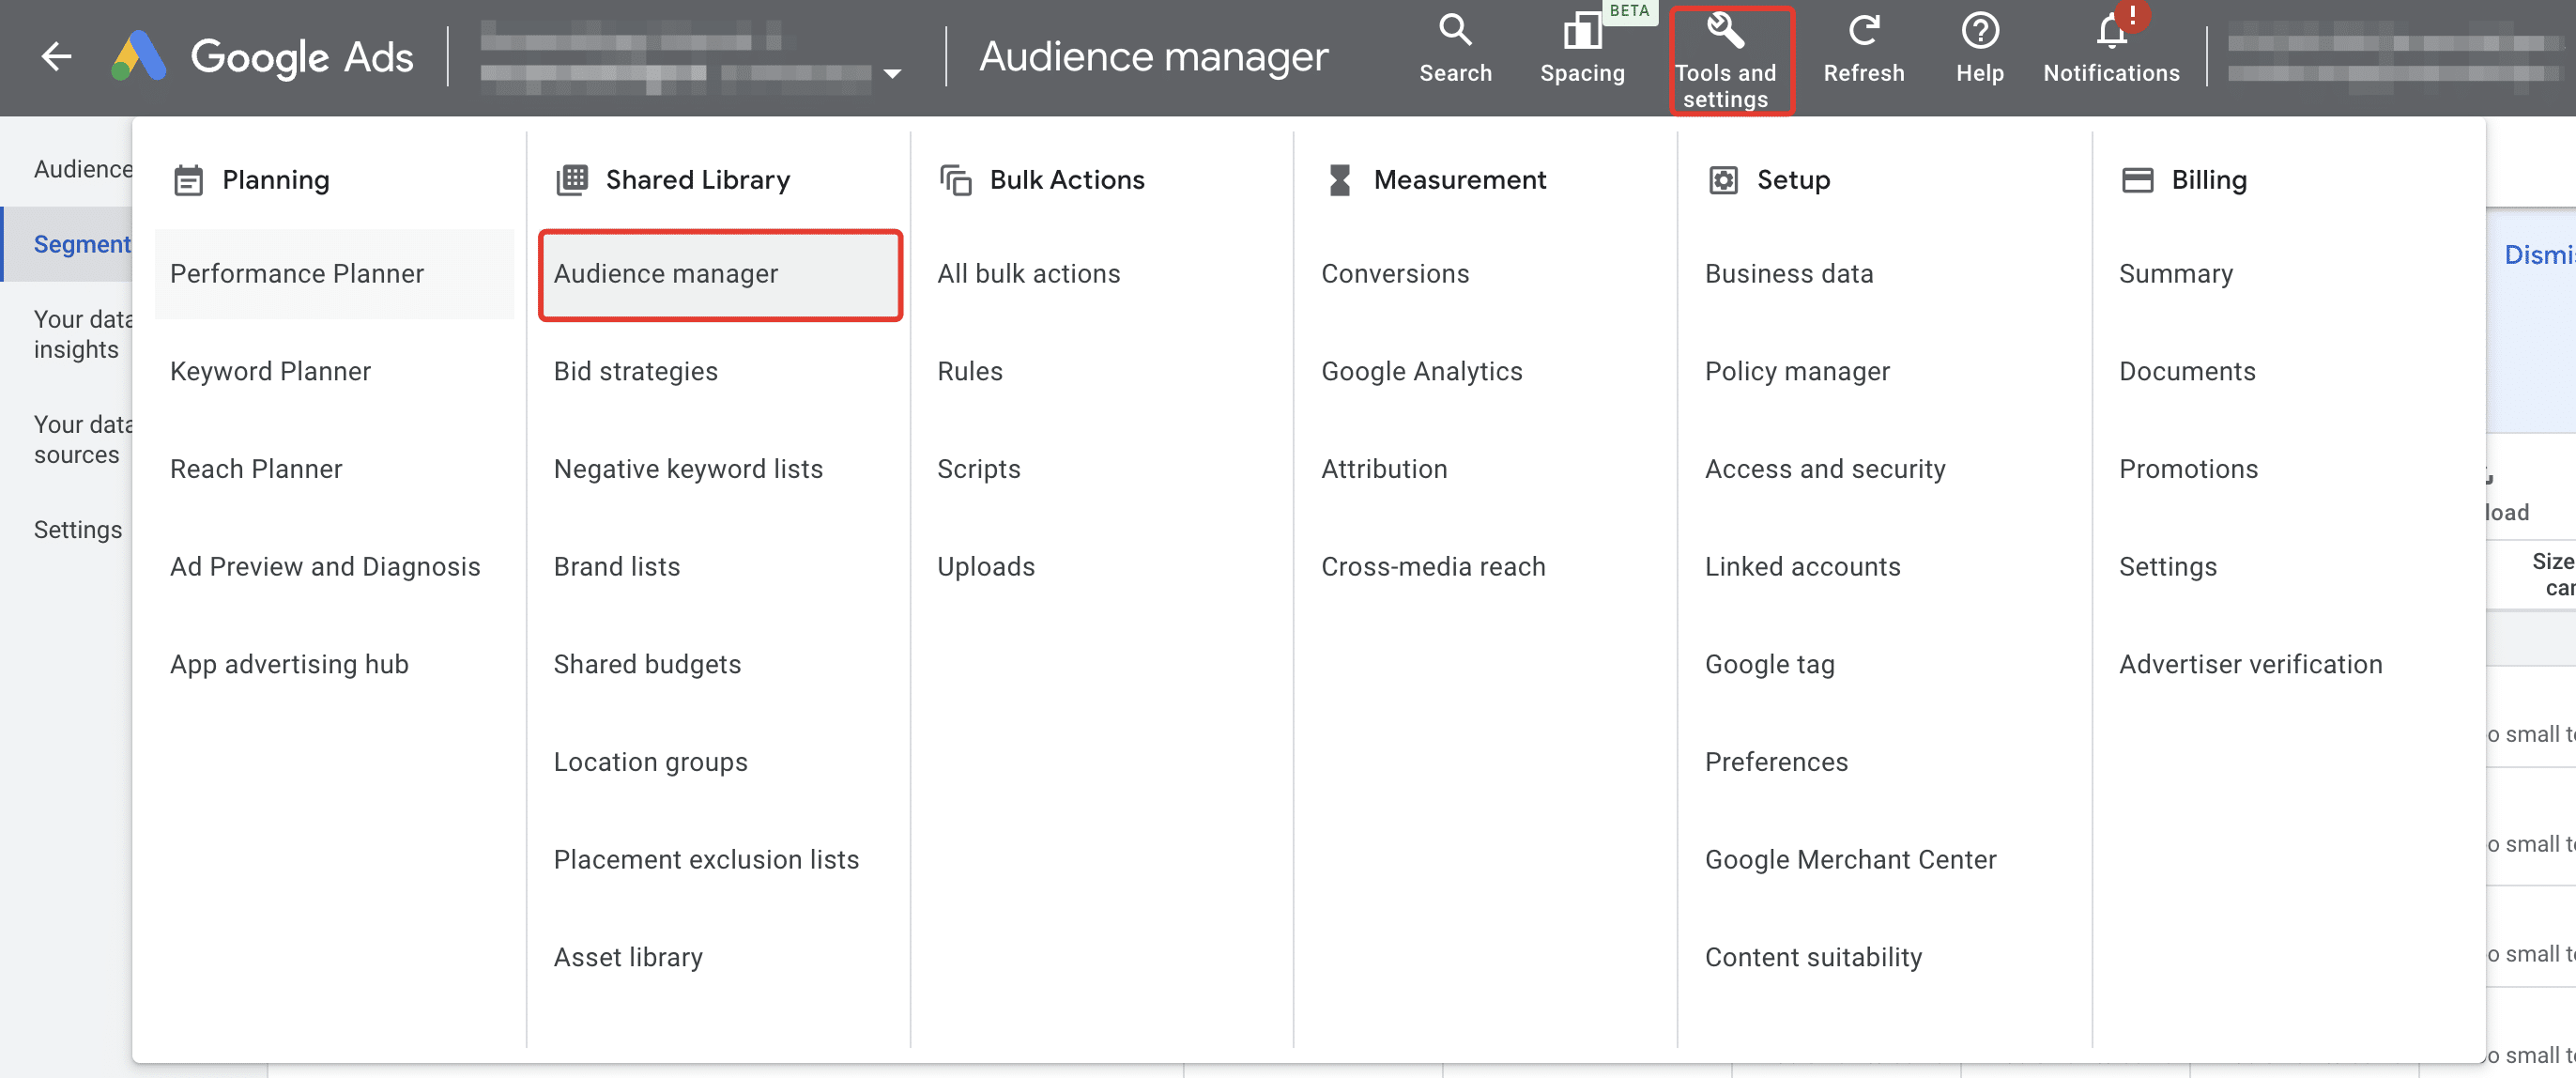
If you would like to create a new audience in Google Ads with the data from Google Analytics, you can do so by clicking on the blue plus button. Choose Google Analytics as a source and select your Google Analytics property from the drop-down list. You can create a new custom audience based on the criteria you want to use. The audiences you create in Google Ads will be synchronized with Google Analytics.
4. Set up Facebook pixel
You can target the users visiting your IWantTo.Review page also on Facebook and Instagram. The pre-requisite is that you have Google Tag Manager installed on your landing page. Add your Meta pixel to your Google Tag Manager account using these instructions.
Once you have your Meta pixel installed in your GTM account and your GTM container code installed on your IWantTo.Review landing page, you can check that it works in your Meta Business Manager account. Go to Event Manager, then to Data sources, and choose the right pixel. You will see an additional domain in the overview.
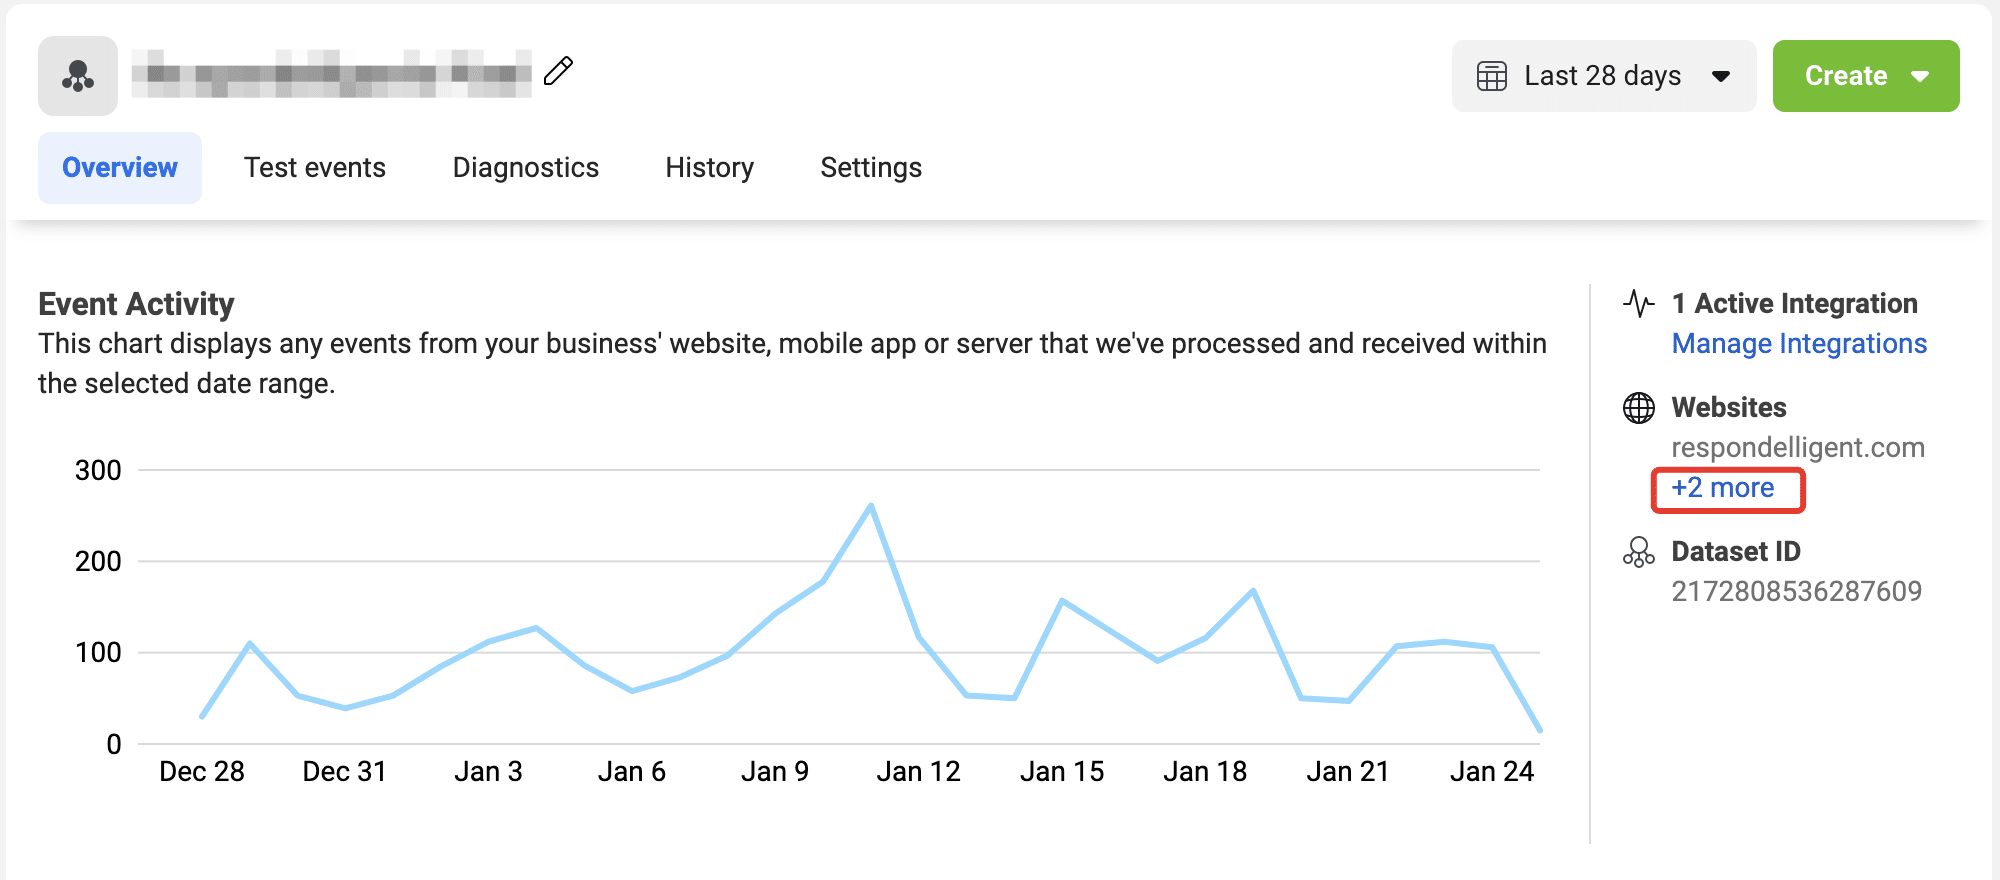
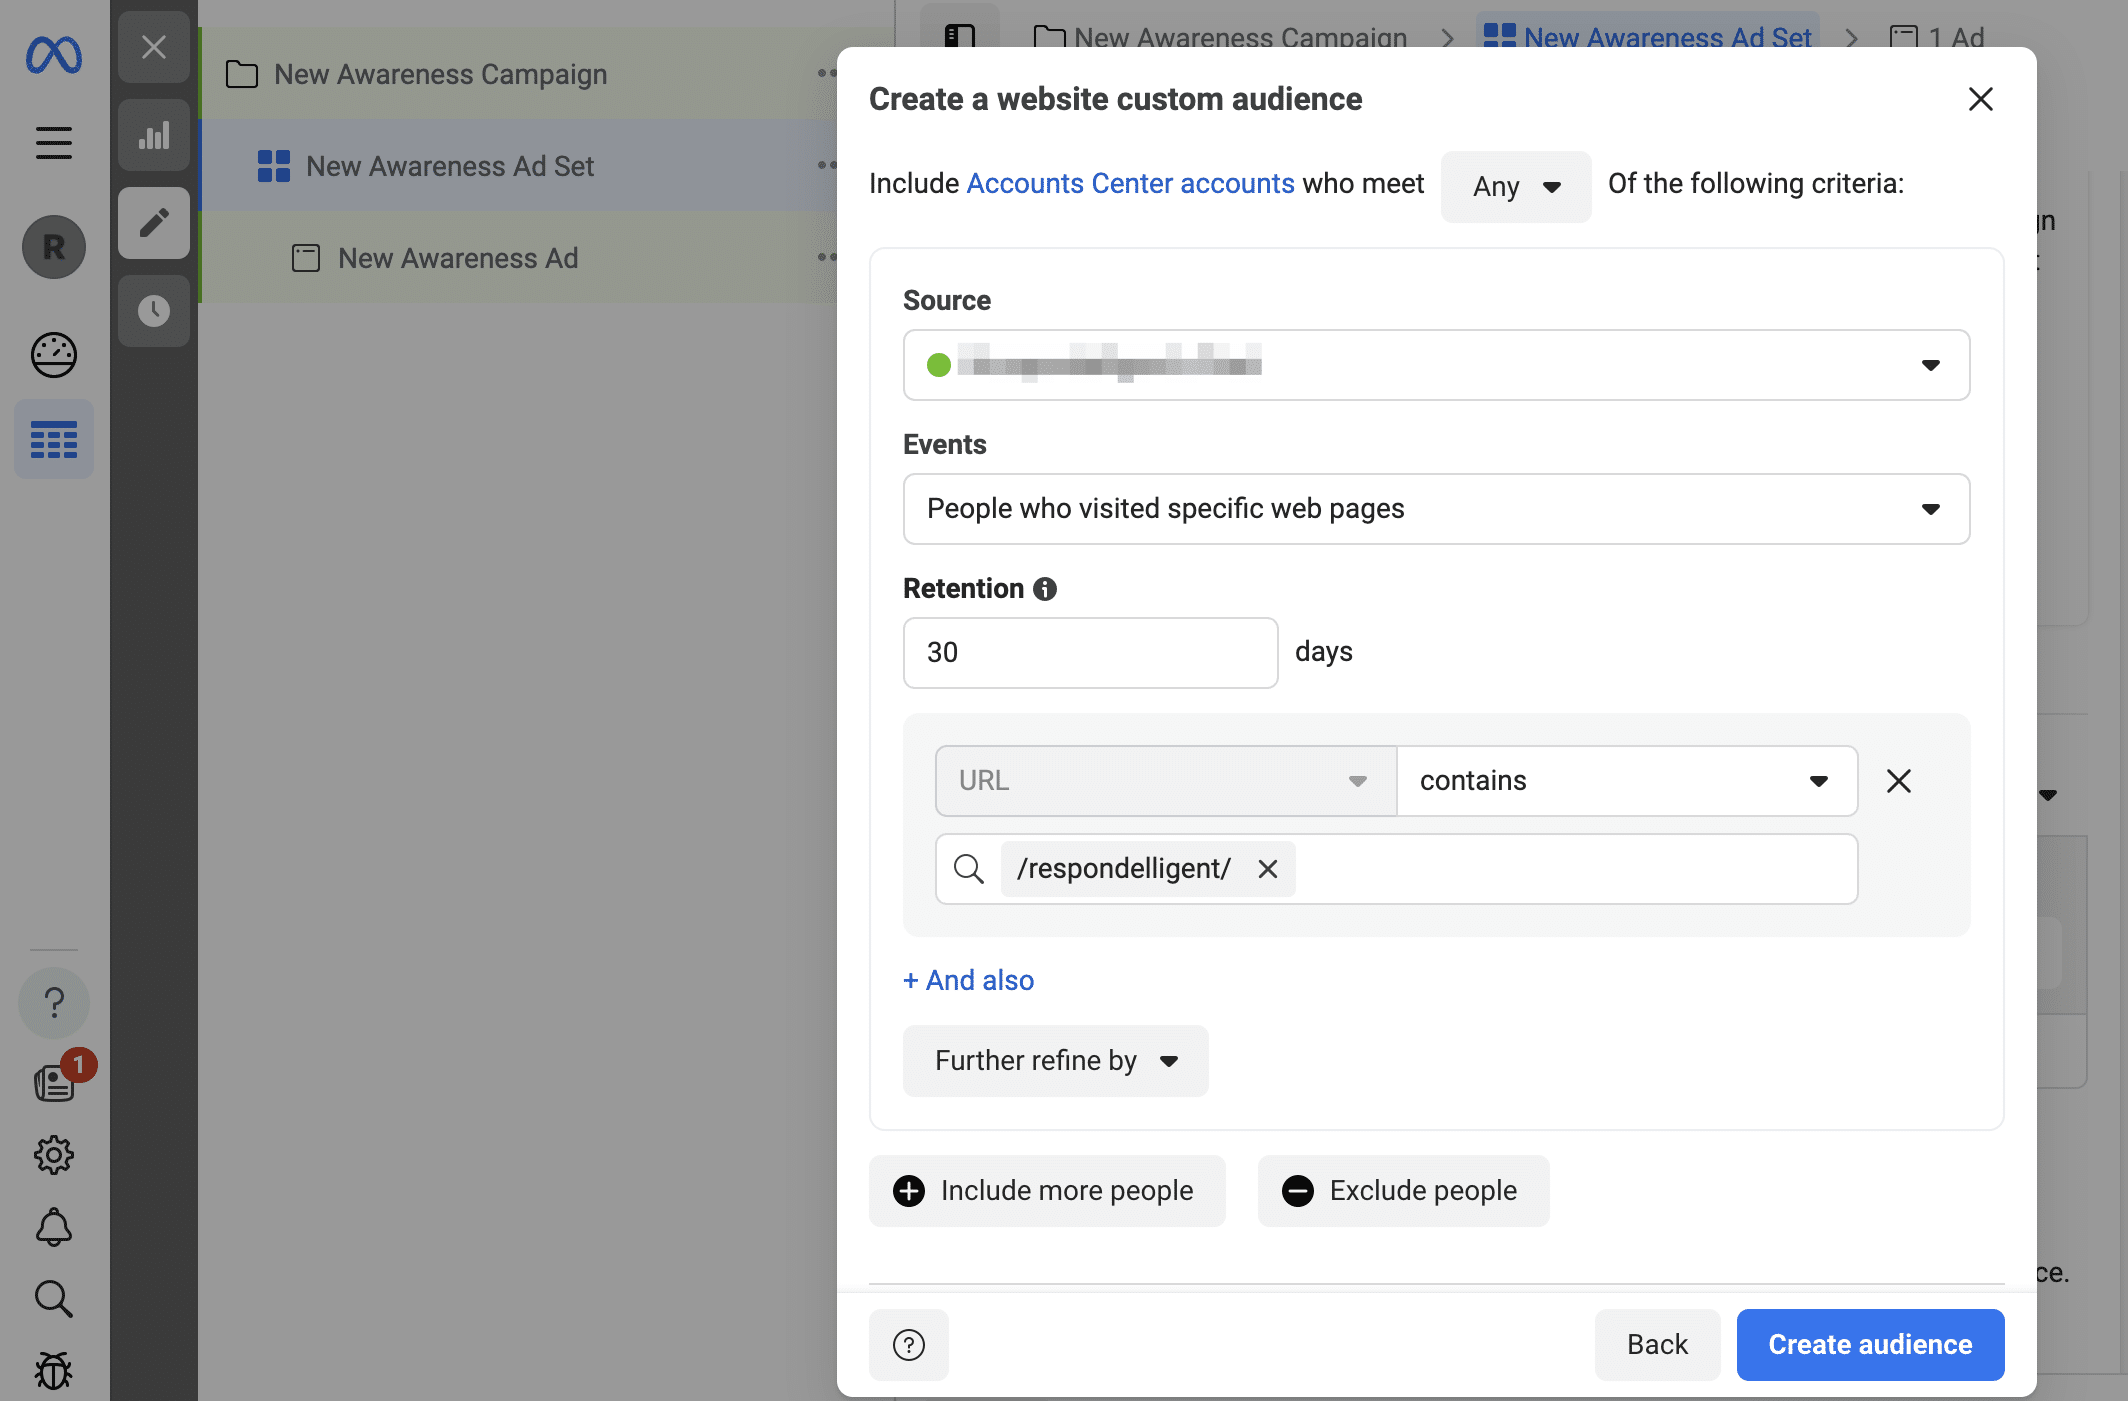
Now you can create a new website custom audience under Audiences or you can start creating a campaign and create an audience there. Based on this audience, you can also create a look-alike audience.
We have provided here general instructions on how to set up tracking and create audiences in Google Analytics, Google Ads, and Facebook. For technical integration or assistance with tracking, please contact your webmaster.
Furthermore, please make sure that you comply with data protection legislation in your country.