IWantTo.Review
The best way to increase the number of positive reviews is to ask your guests. We have built IWantTo.Review to help you encourage guests to leave a review after their visit.
You can find IWantTo.Review in the left-side menu. The tool allows you to create a landing page that you can later share with your guests.
1. Setup
Start with Setup to build your customized landing page for review collecting. Define how your business name should be written. Once you make changes in the box, the landing page will be updated in real time, and the button will turn from green to red to remind you to save changes.
Shortname is how your business name is written in the URL. You can see it above your landing page. This URL you can share with your guests, use it to build QR codes or in other channels of your choice. If you change the shortname, the system will tell you immediately if the shortname is available, and the URL slug will be updated.
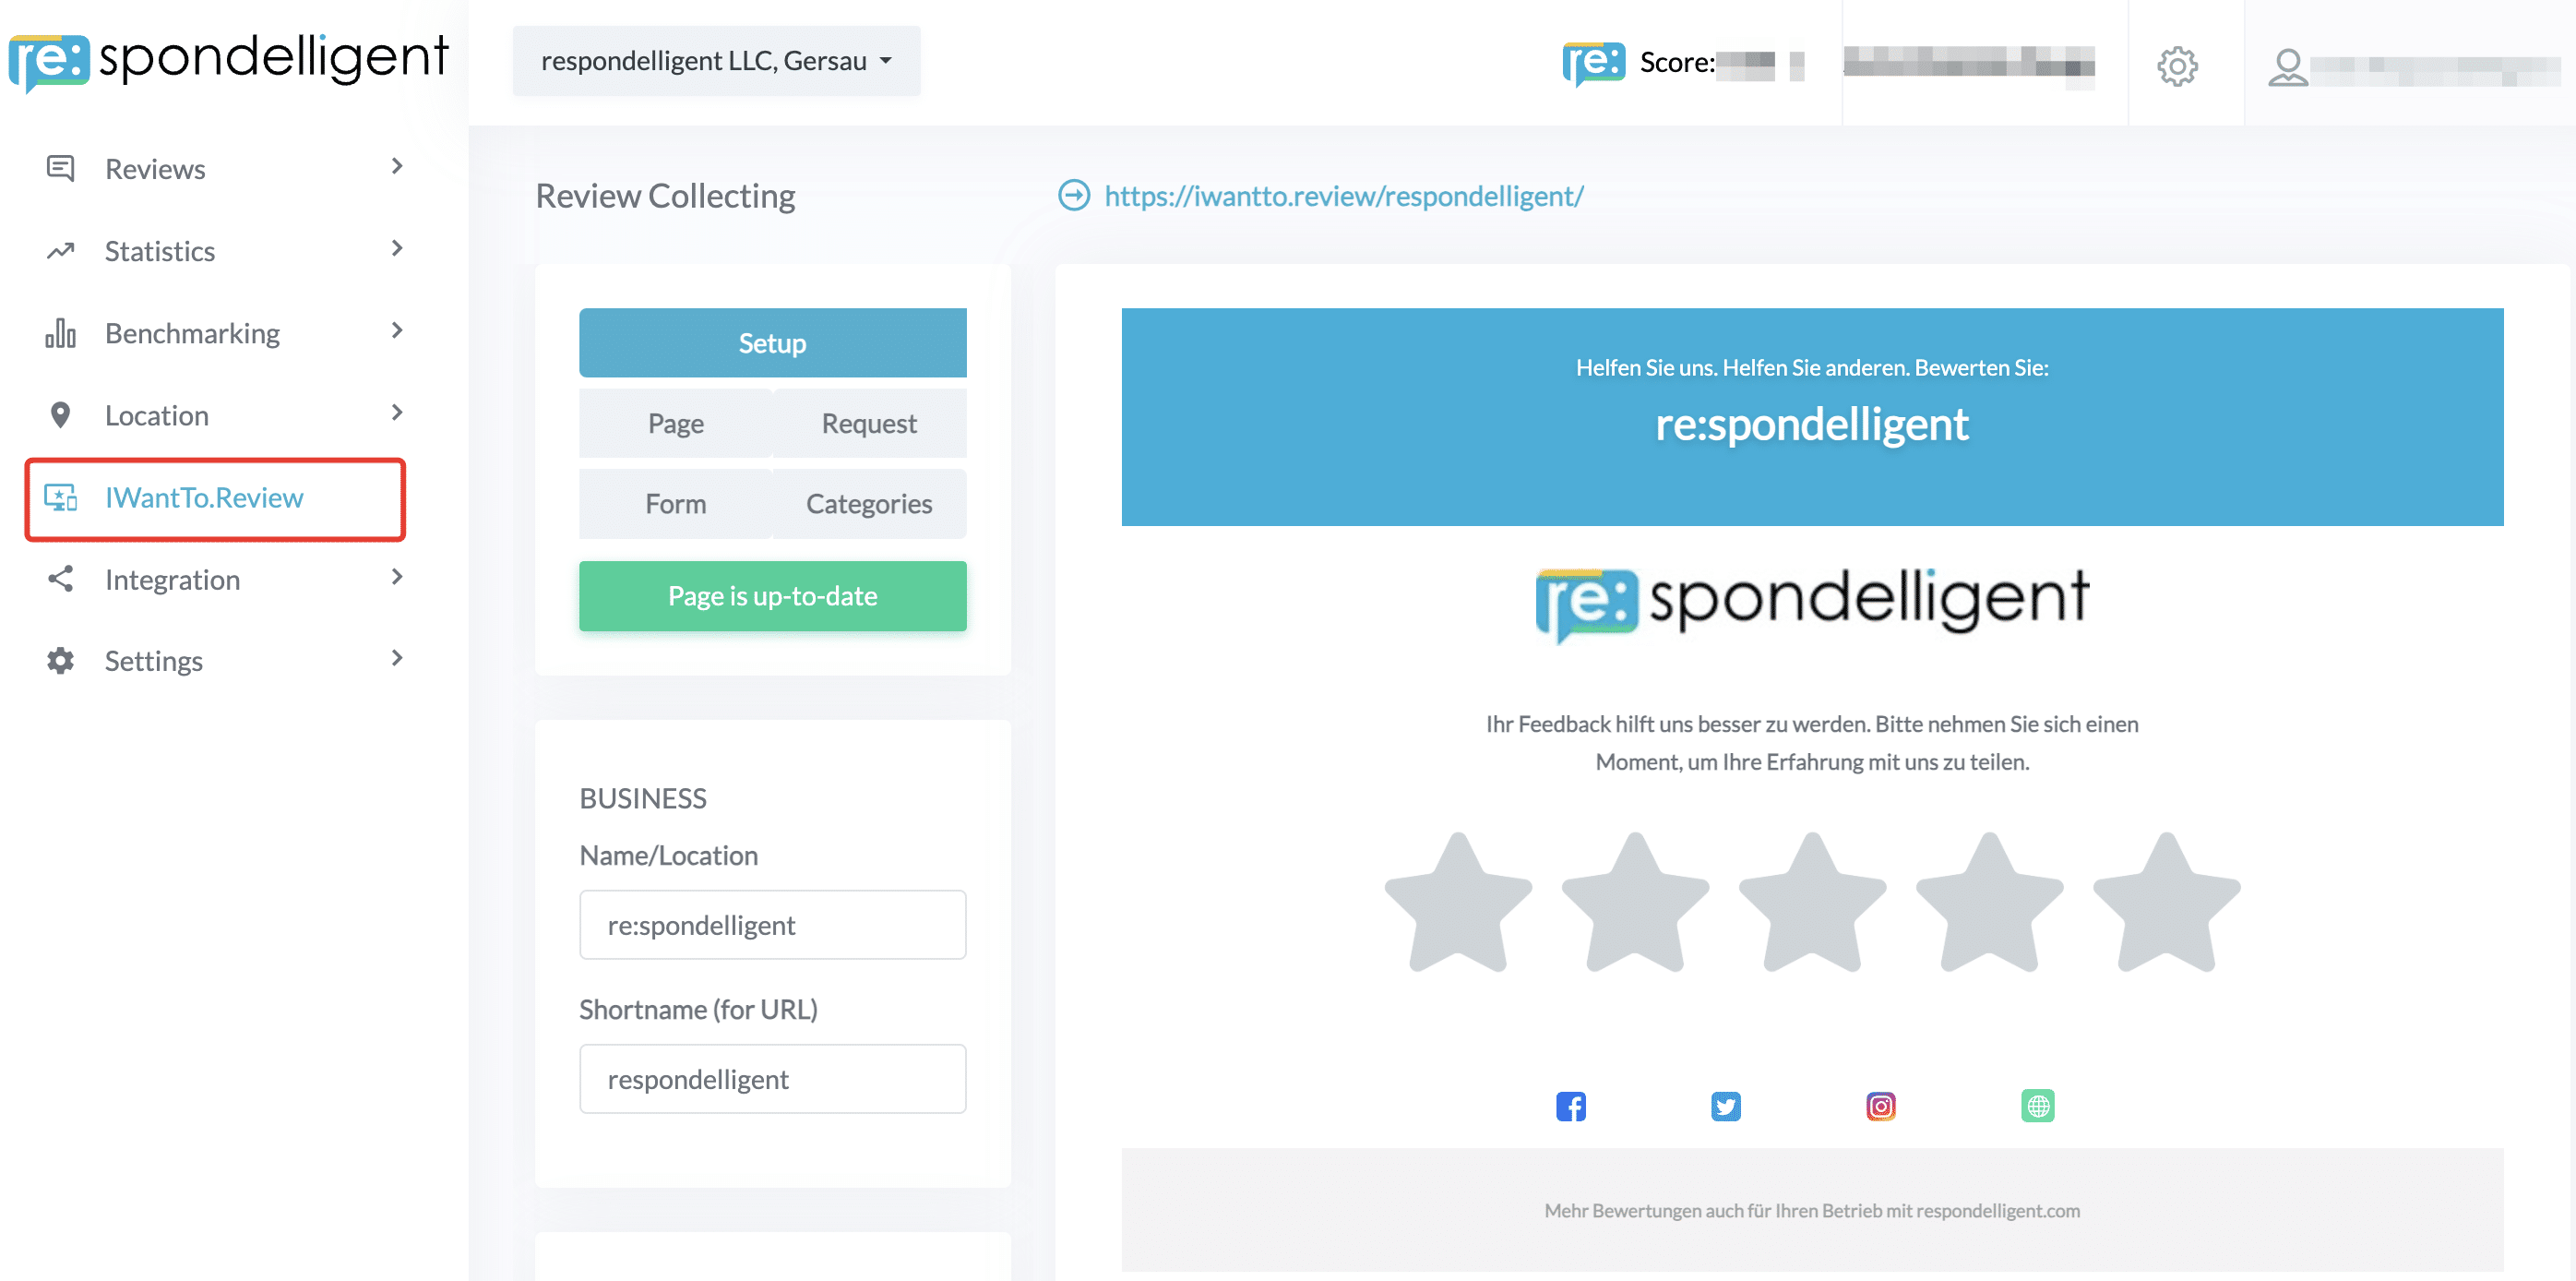
The rating that guests leave on IWantTo.Review page will be saved in re:spondelligent app, but you can also forward your guests to the review platforms of your choice. It makes sense if the rating is good. Therefore, scroll down to Review Site Listing, start typing, and choose the name of the review site from the drop-down list. You can add those platforms which are connected in the app.
Furthermore, here you can define which social links you would like to show on your landing page. Add the URLs to the relevant boxes, the icons will immediately appear under the star rating. You can also untick the box if you don’t want to add any social media links.
Don’t forget to publish changes.
2. Page
Click on the Page tab on the left to design your landing page.
First, you can upload your logo. We recommend using a logo in JPG format with a white background. Once you upload your logo, it will immediately appear on the page. You can also decide whether you would like to have your business name in the header. Uncheck the box if you only want to have the logo on the page.
Scroll down to customize the colors of the header and text. Click on the color bar to choose another color.
By default, your landing page is available in one language. However, you can make it translatable. To do this choose the language of your landing page from the drop-down list. It will be later automatically translated and available in different languages.
Write and format the text of your header, main message, and footer. You can skip the footer message by unchecking the box.
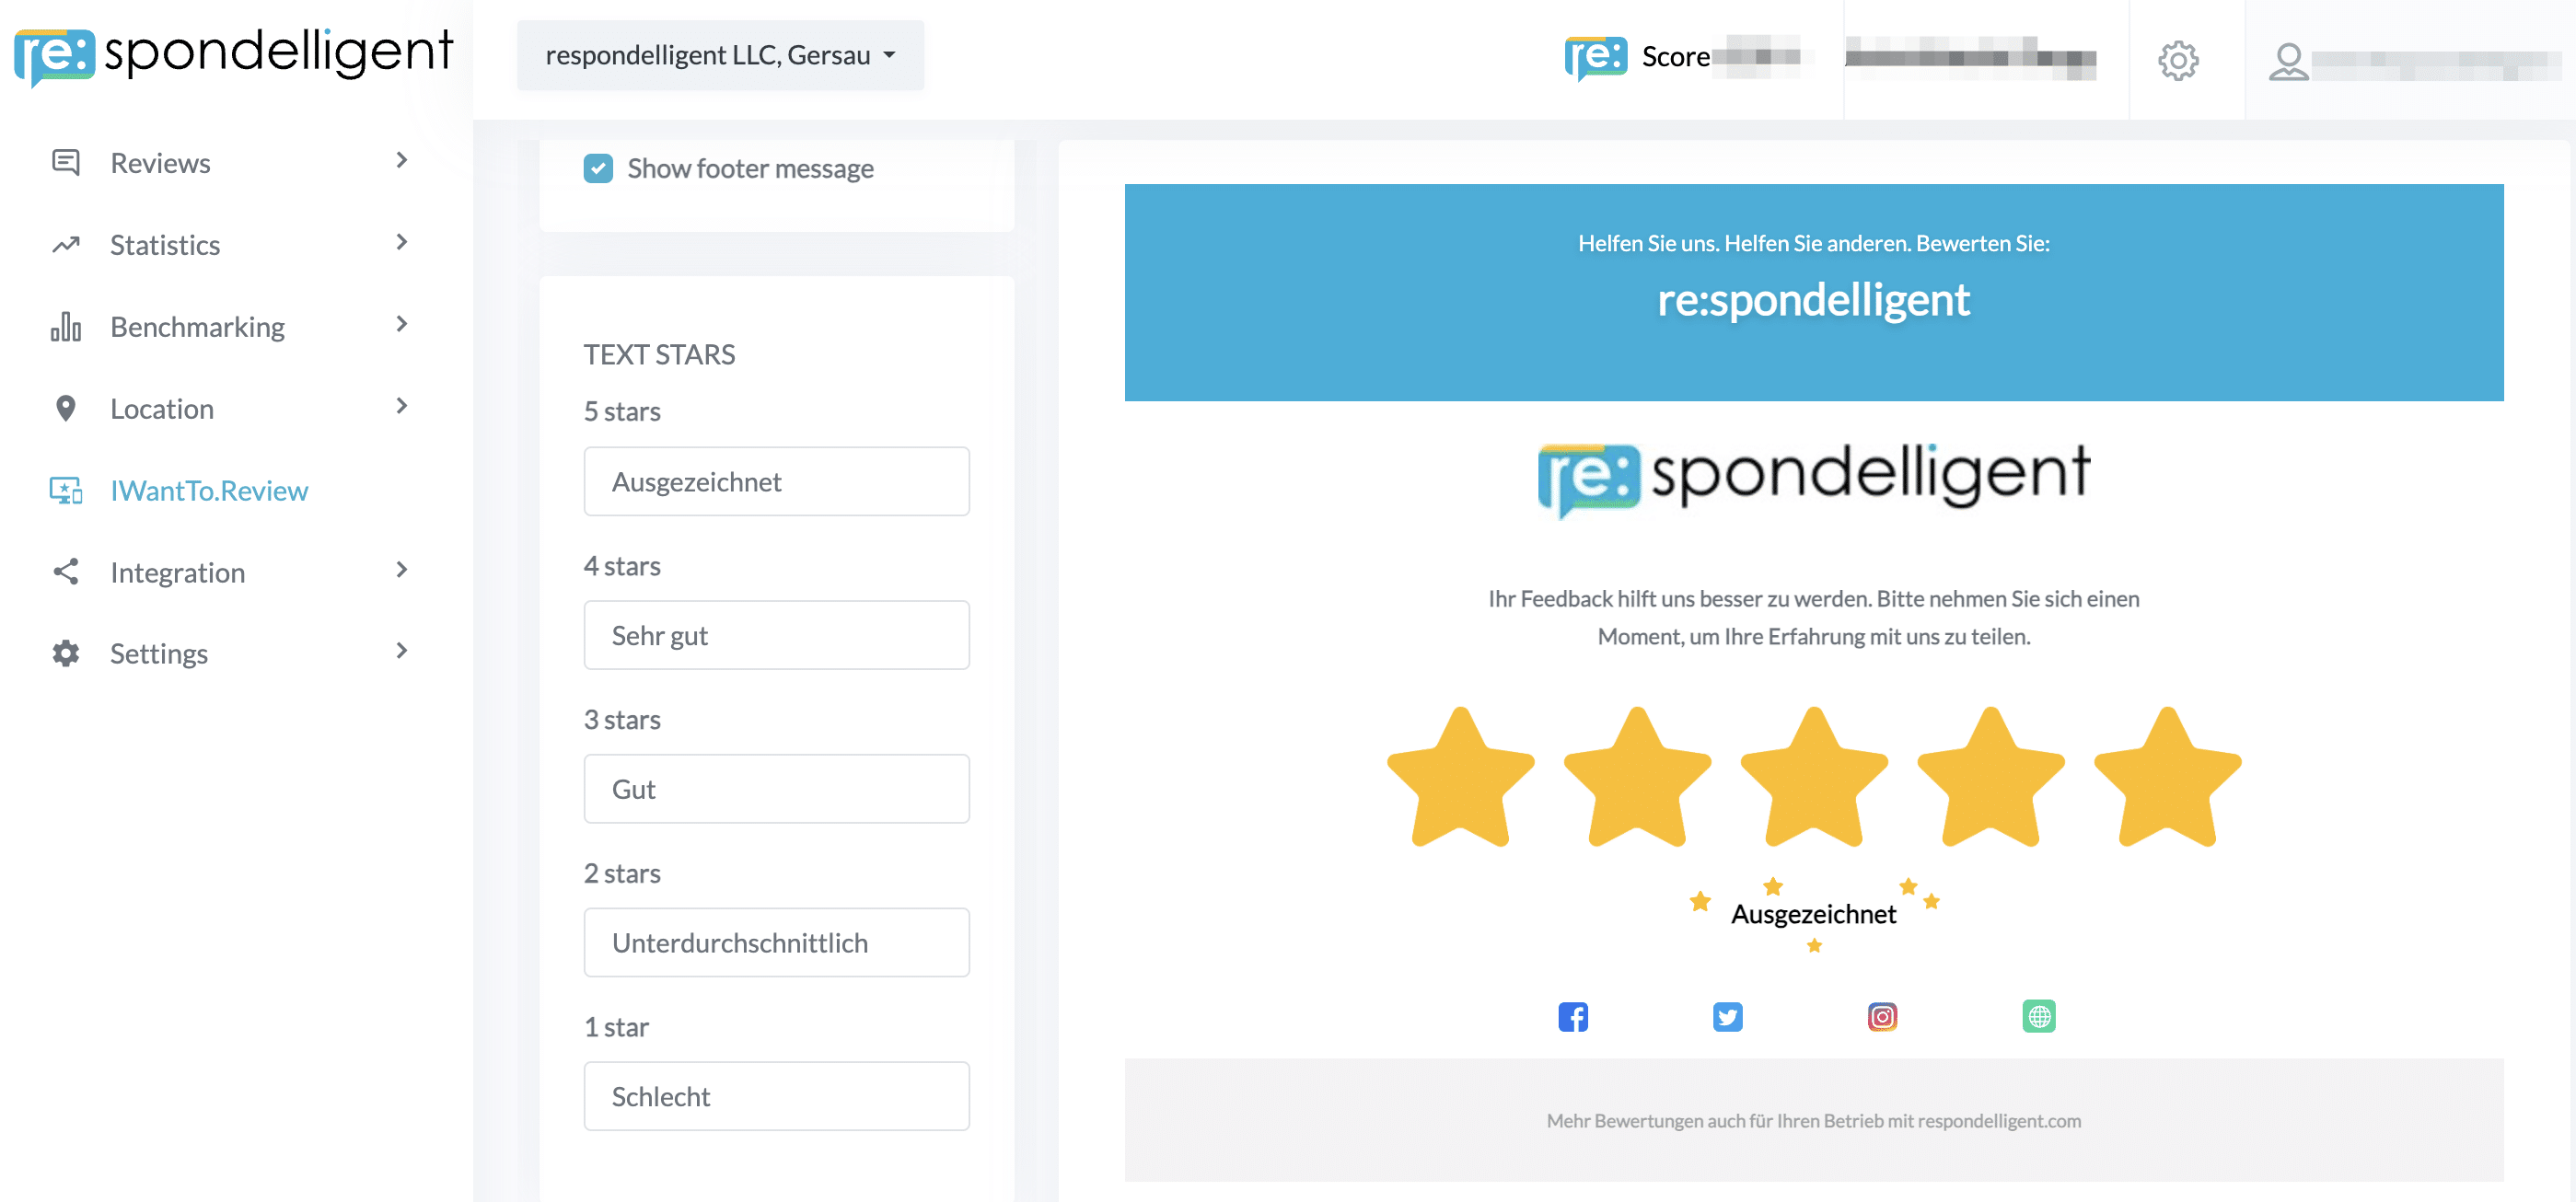
When you share the page with your guests, they can hover over the stars and click to select a rating. In the page settings, you can choose the text that appears under the stars. When guests leave their rating, they can just mouse over the stars.
Again, don’t forget to publish changes and go to the next tab.
3. Request
IWantTo.Review tool allows you to generate more positive reviews on the platforms of your choice. Earlier in the Setup tab, you defined the review platforms you would like to direct your guests after they have left a rating on IWantTo.Review landing page. Now, choose the Request tab to finalize the review request.
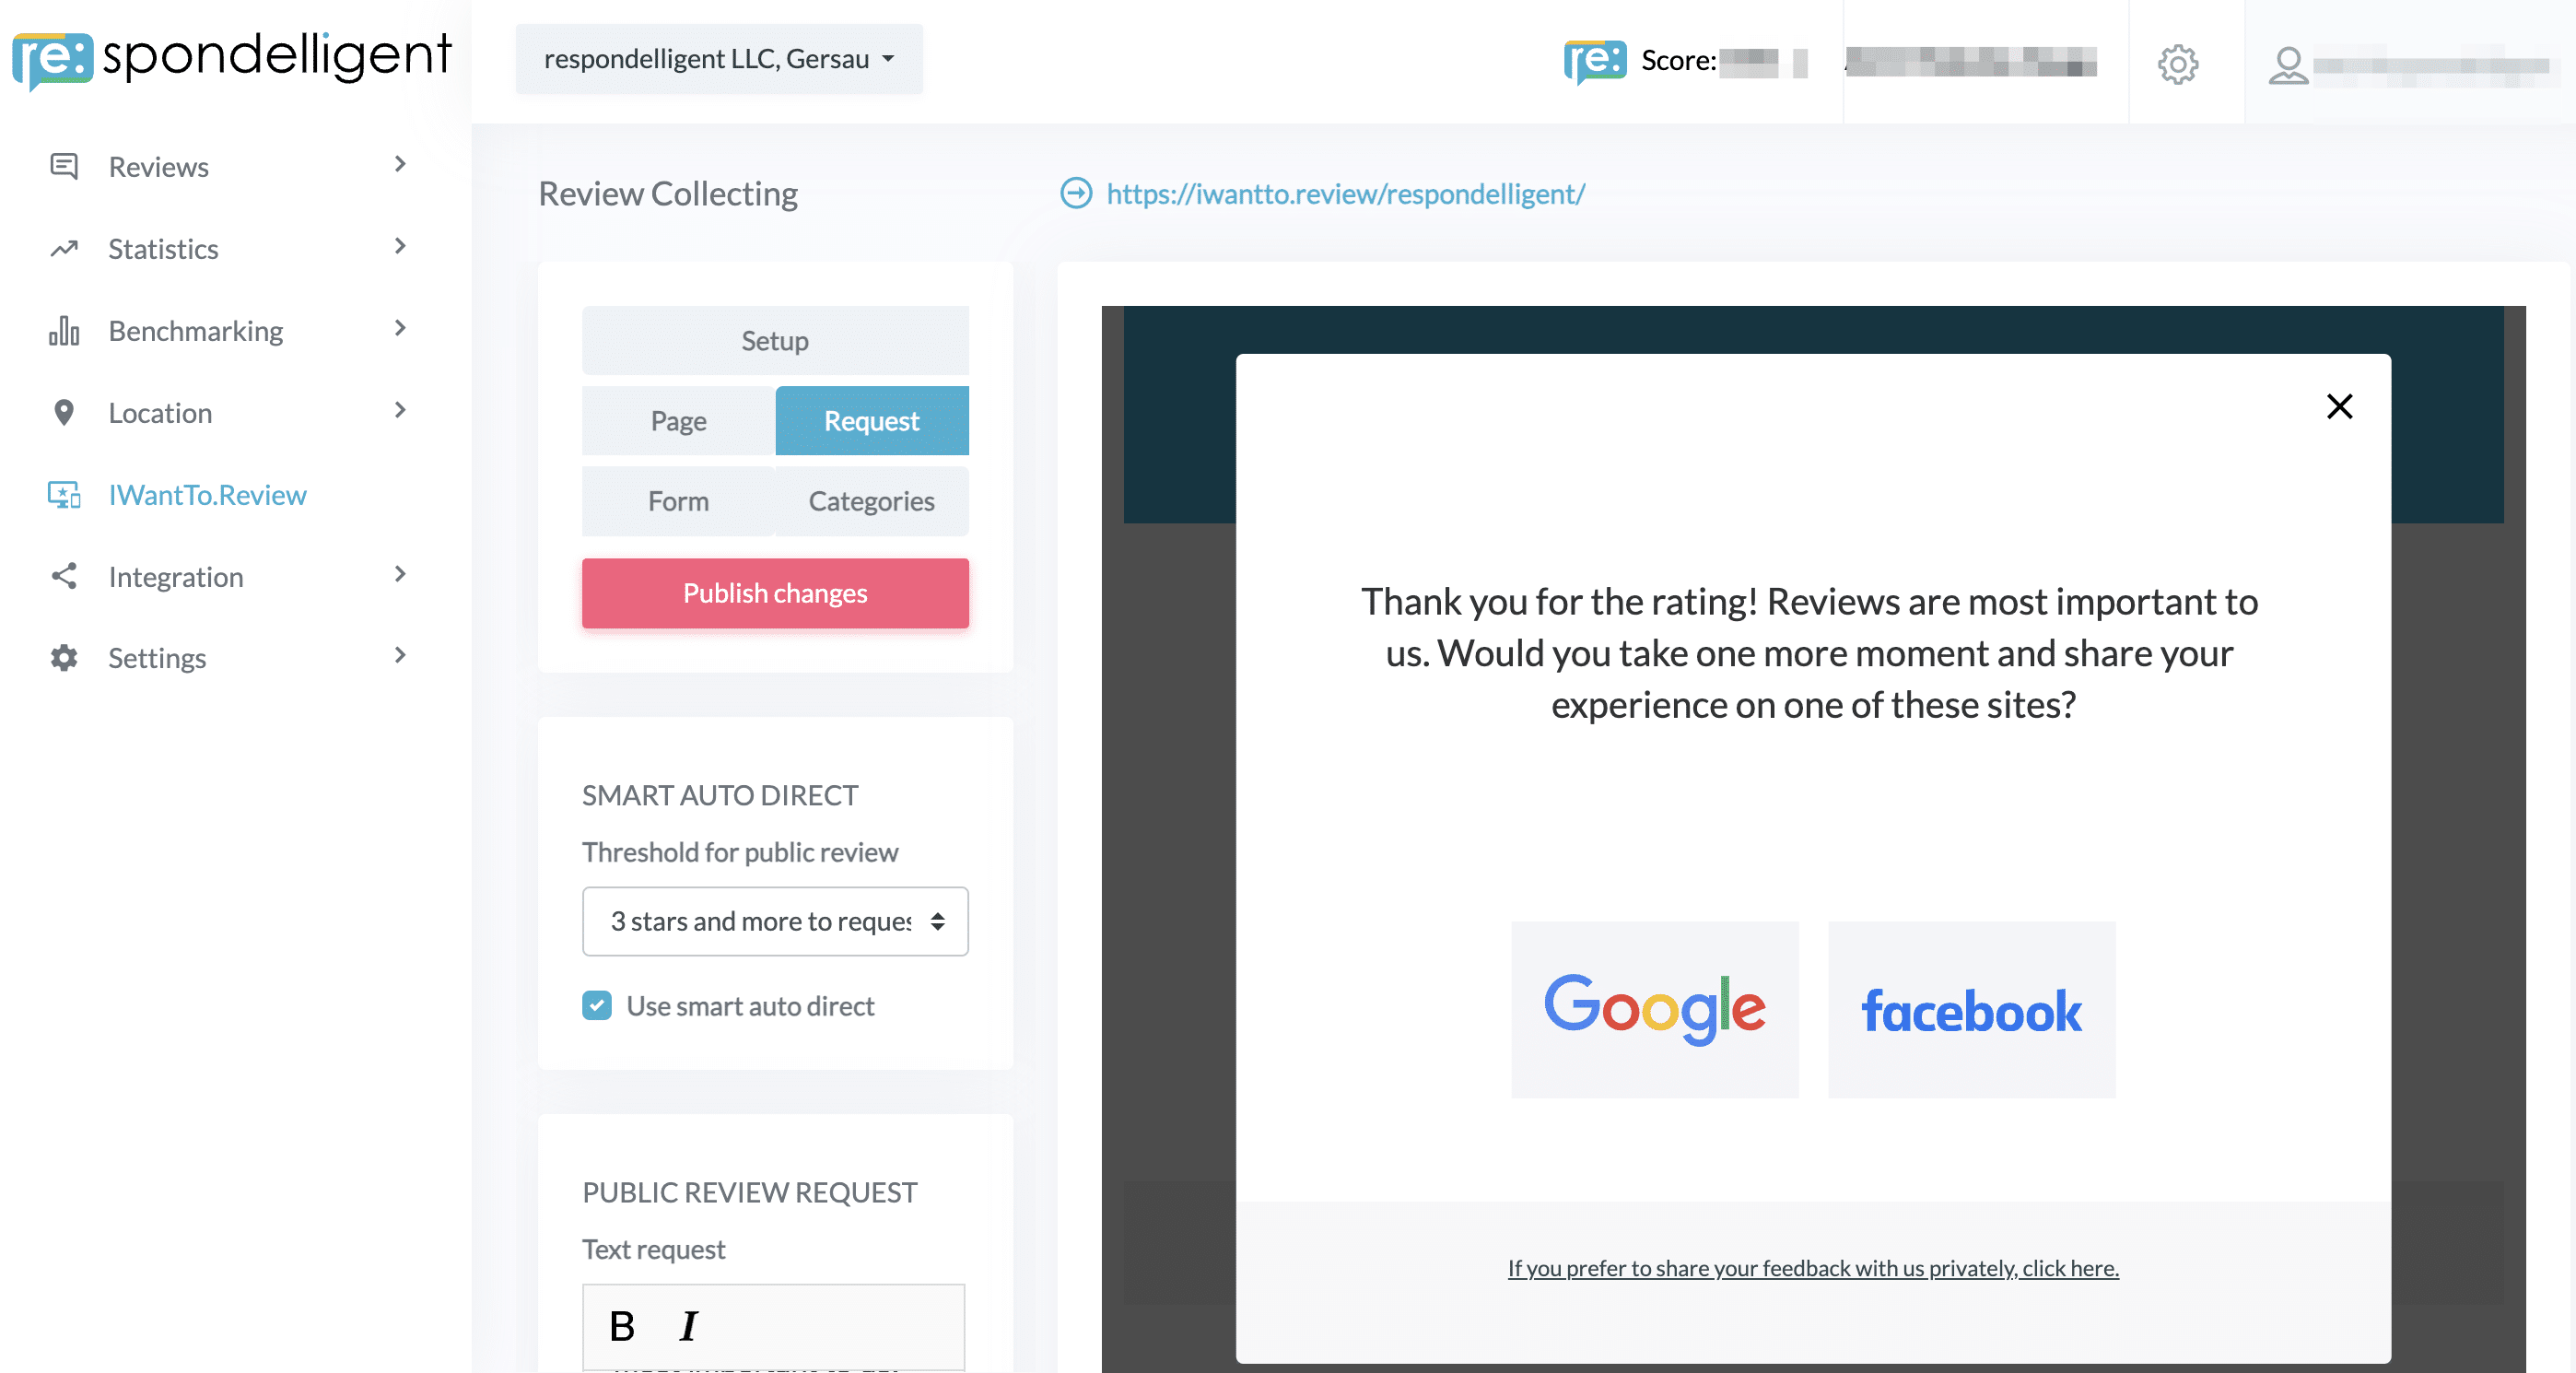
The text for the public review request is pre-written, and you can edit it if needed. The logos of the platforms are clickable and will direct the guests to your review site listings.
Tip You can set up a threshold for public feedback with our Smart Auto Direct* function. In the example, we have chosen 3 stars and more. This means that if guests give you 3 stars or more, they will be directed to the relevant review platforms. If, however, they give you less than 3 stars, they will be prompted to fill in a private feedback form.
* Some review sites don’t allow smart auto direct. Its use is your responsibility. If in doubt, switch off the function.
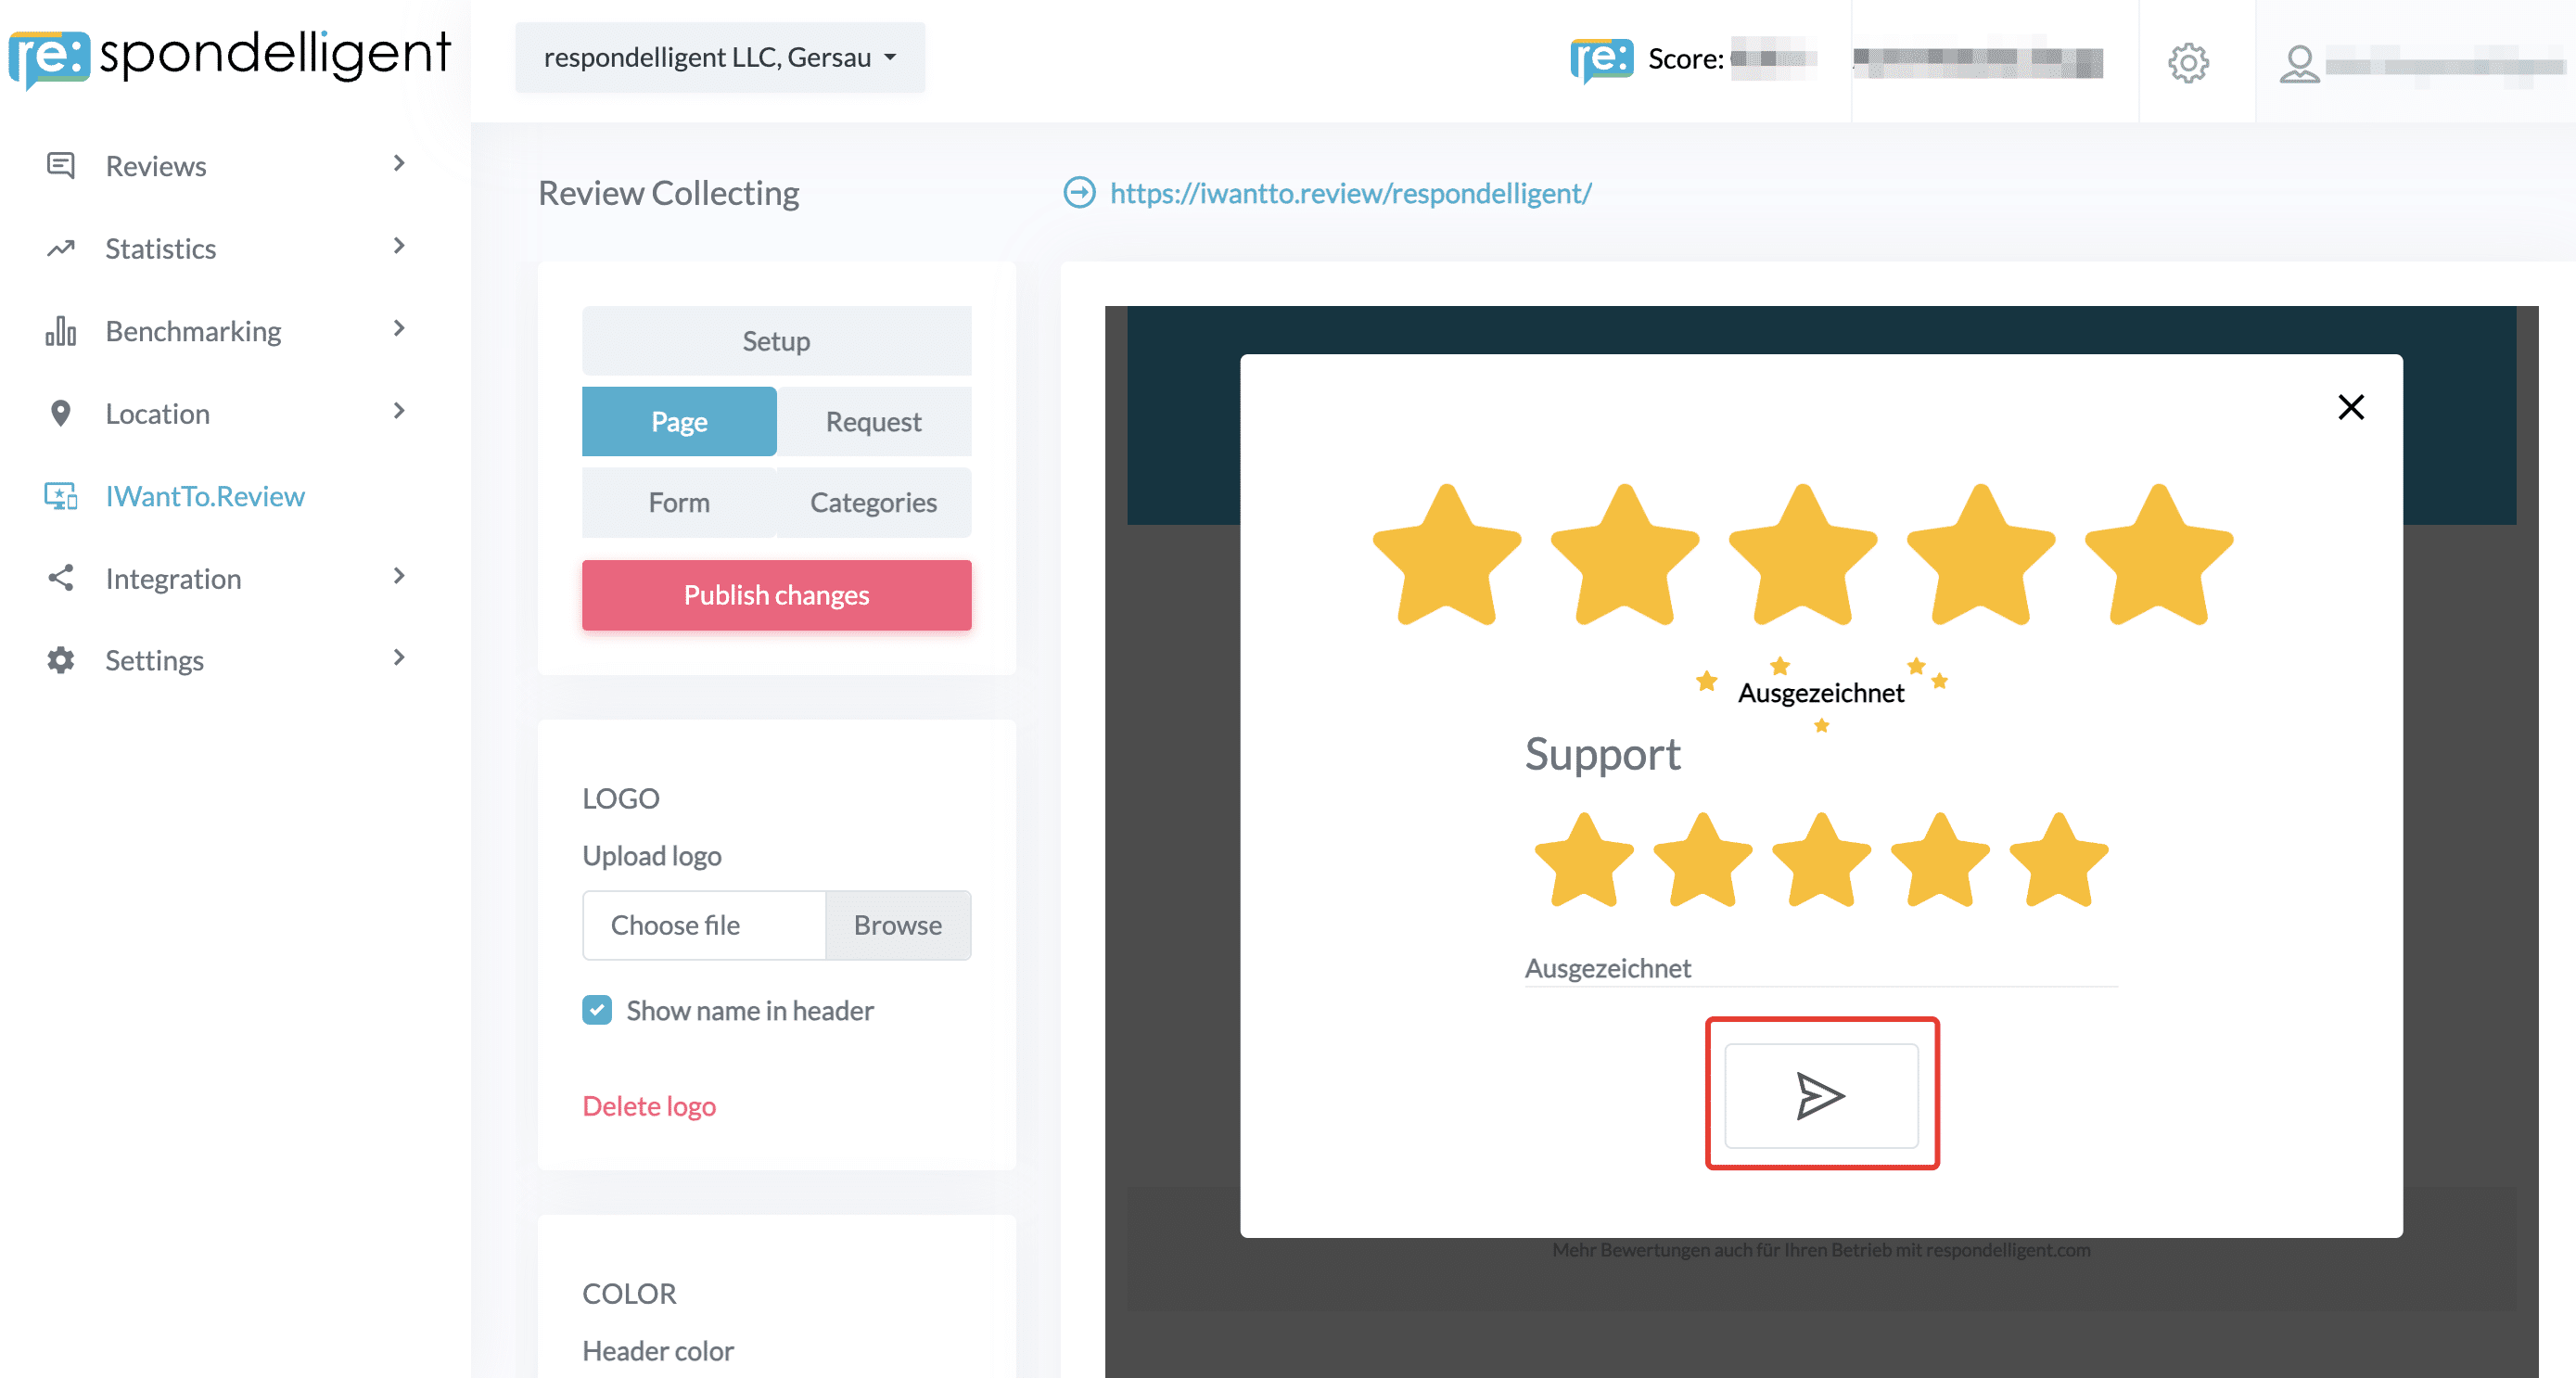
You can test directly in the tool to see how it works. Just go back to the Page tab, choose the rating, and click on the arrow sign.
Don’t forget to save your request settings and go to the next tab to set up your private feedback form.
4. Form
Click on the Form tab to design a private feedback form. Here you can edit the text of your request. By default, CAPTCHA is included at the bottom of the form to avoid spam. If you don’t want to use CAPTCHA, uncheck the box.
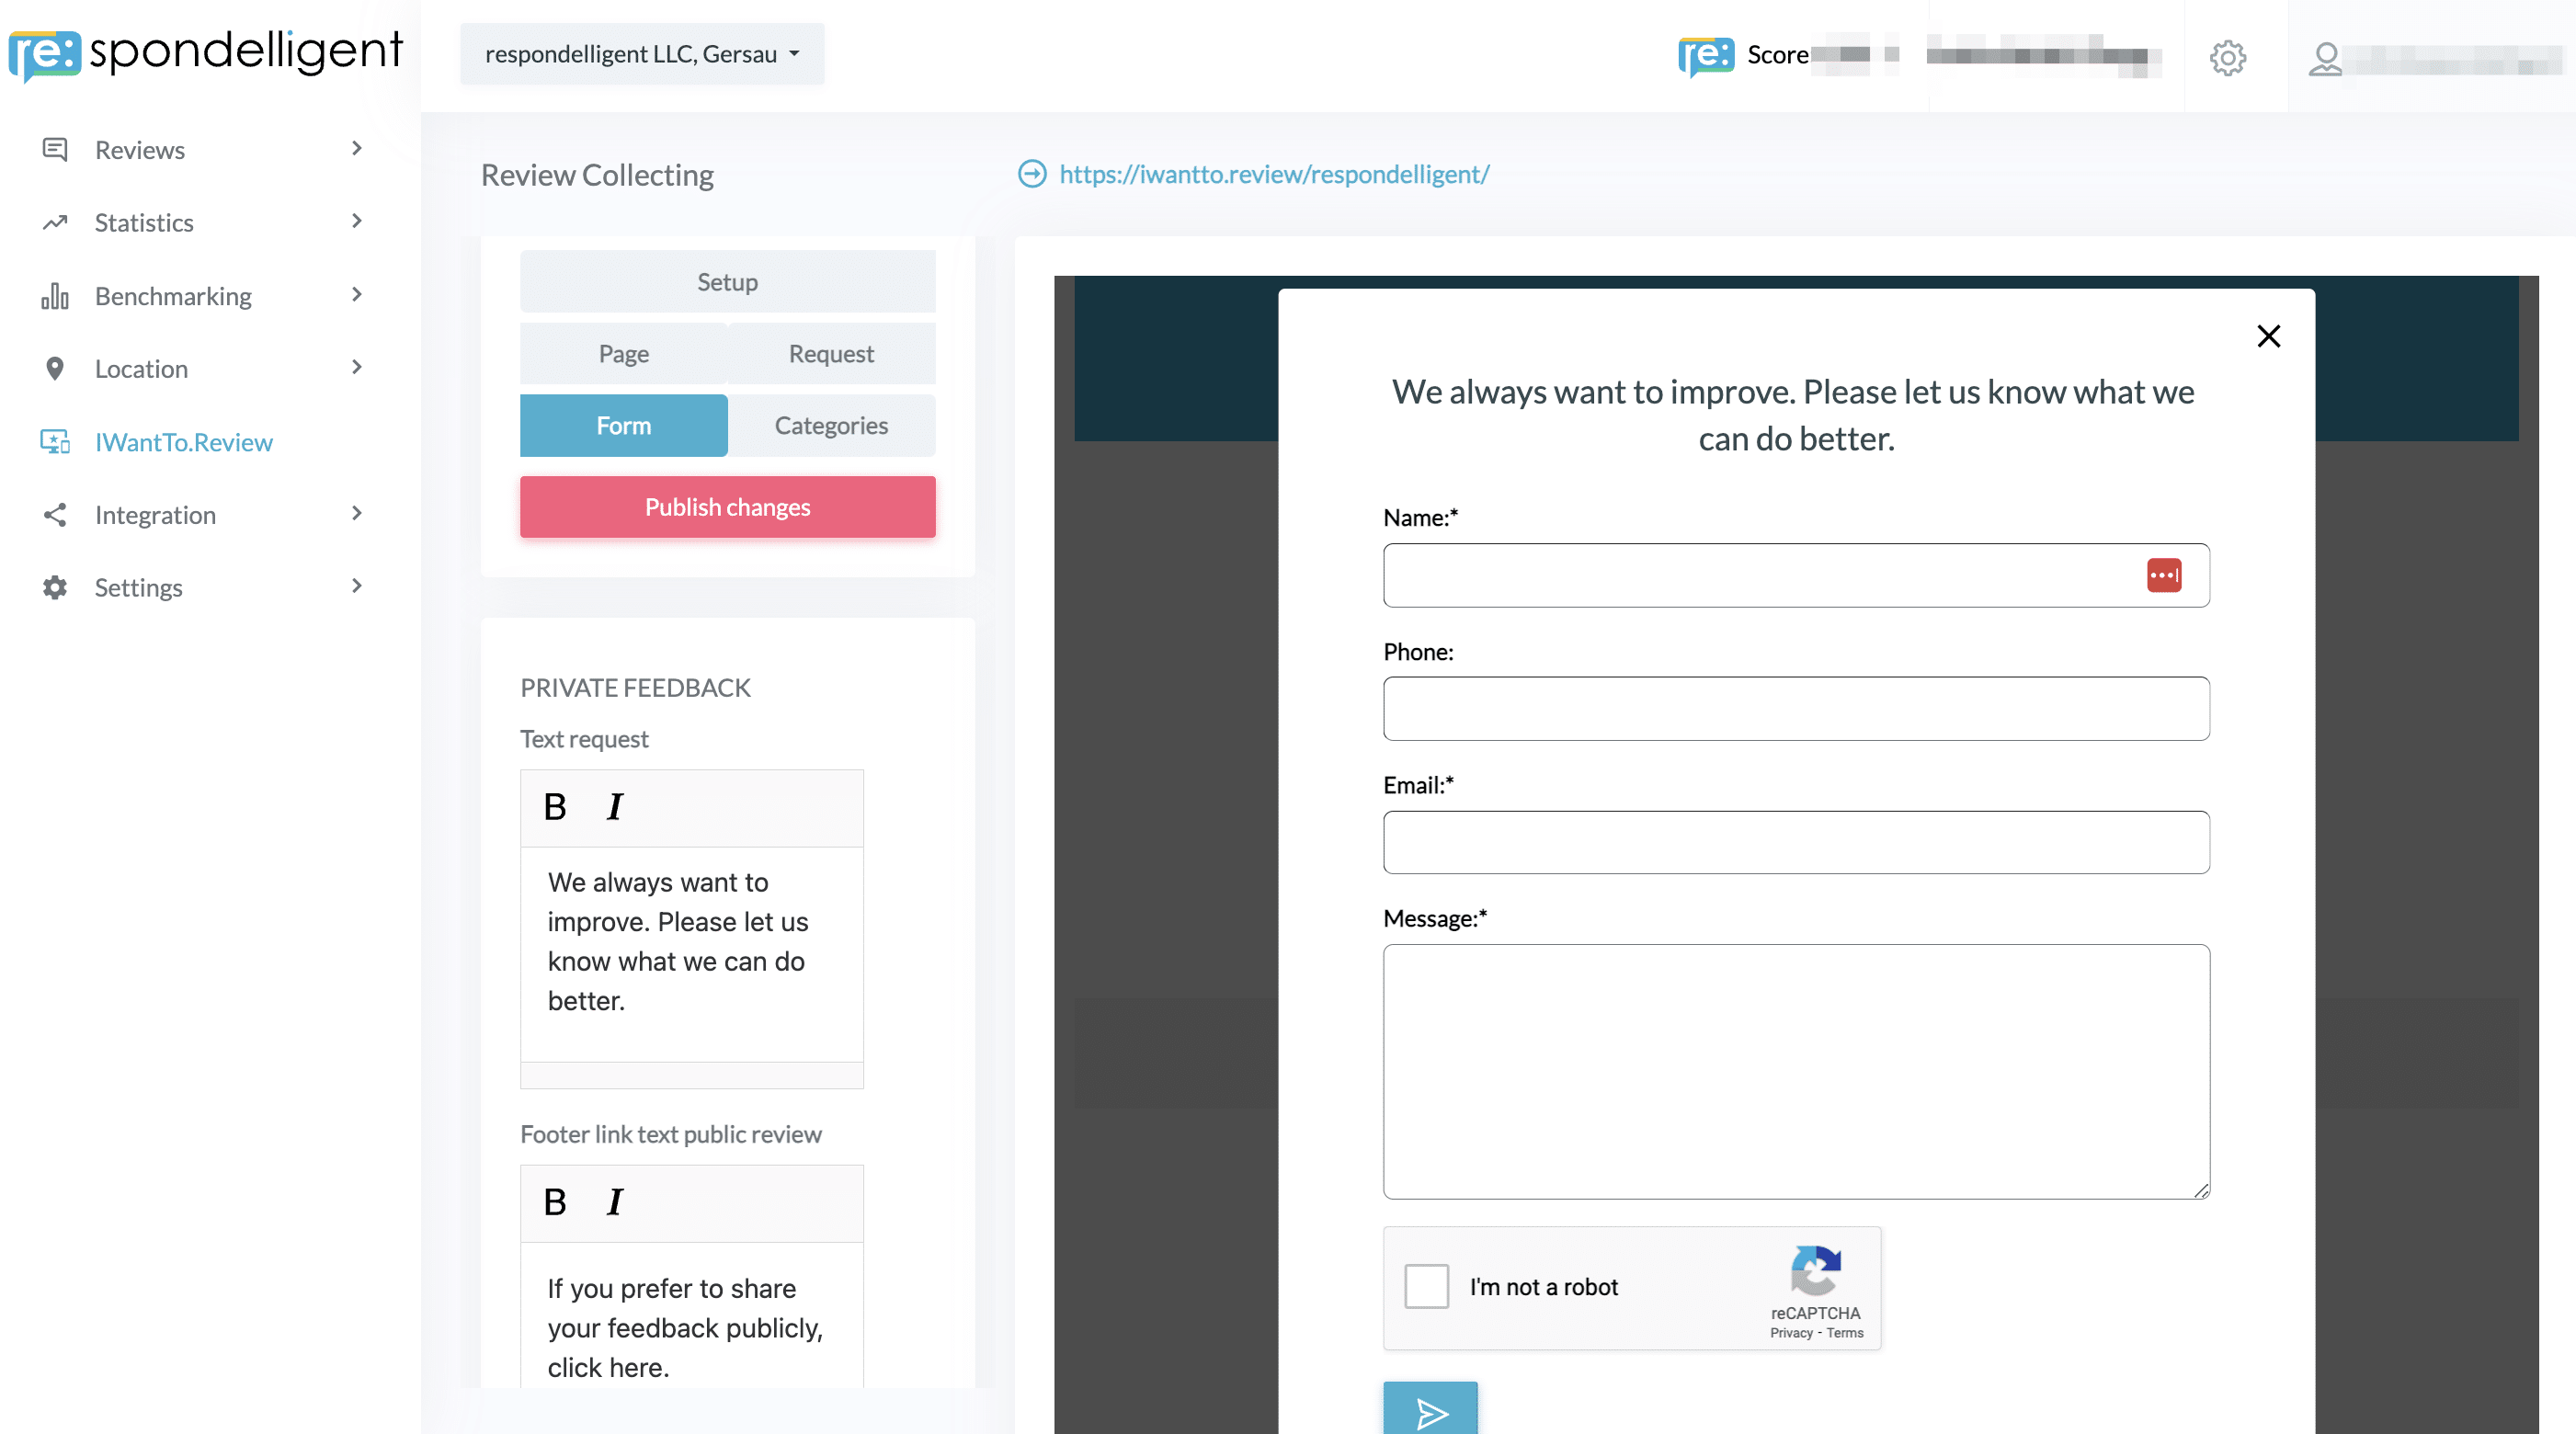
Now, your landing page is ready to be shared with your guests.
5. Categories
Guests may hover over the stars and press wrongly. To avoid this, you may like to add an additional step before the rating is sent. On the Categories tab, click on the checkbox to activate a pop-up confirmation message.
Furthermore, you can add Categories to make the feedback even more detailed and collect more information from your guests. Start typing in the box, for example, Food or Service, and click enter. The categories will be immediately added to your form.
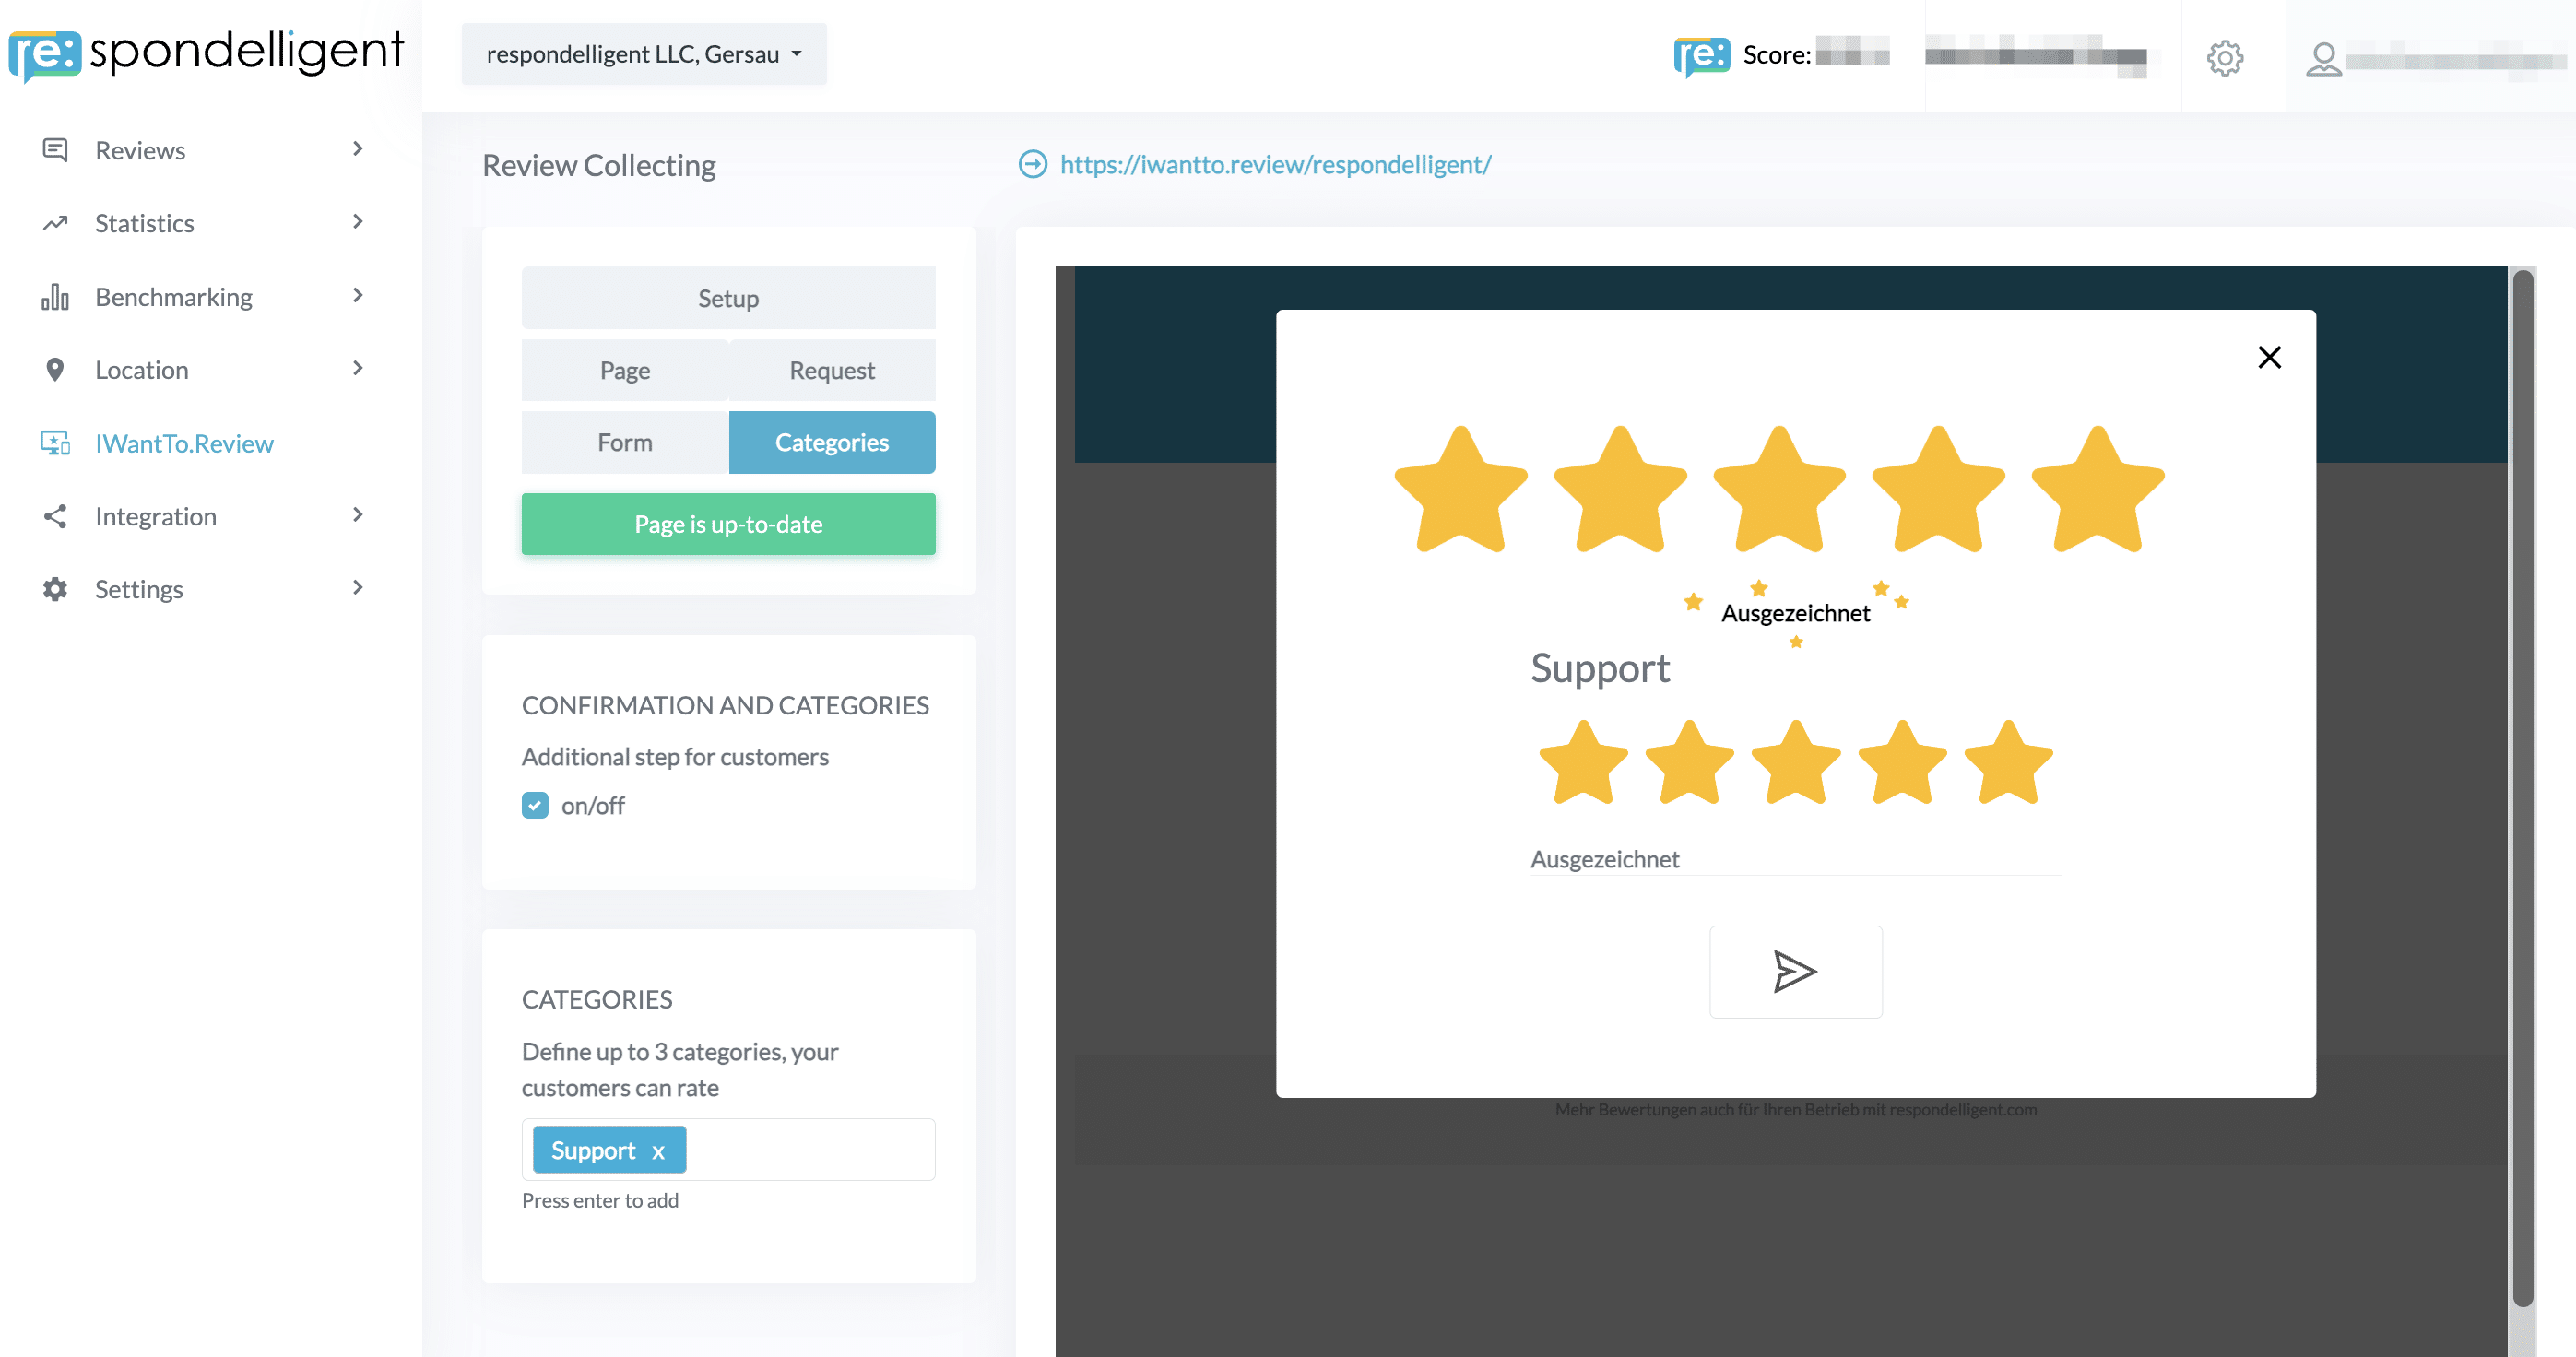
After the guests have confirmed their overall rating and given their rating for the categories you defined, they will be directed to the public review request.
In addition, you have the option to include extra questions to gather more detailed insights. For instance, you can customize it so that if a customer rates some of the categories with 1-3 stars, then questions and text fields will appear. By making these fields mandatory, reviewers are required to provide answers before submitting the form. This ensures that you receive valuable feedback for improvement.
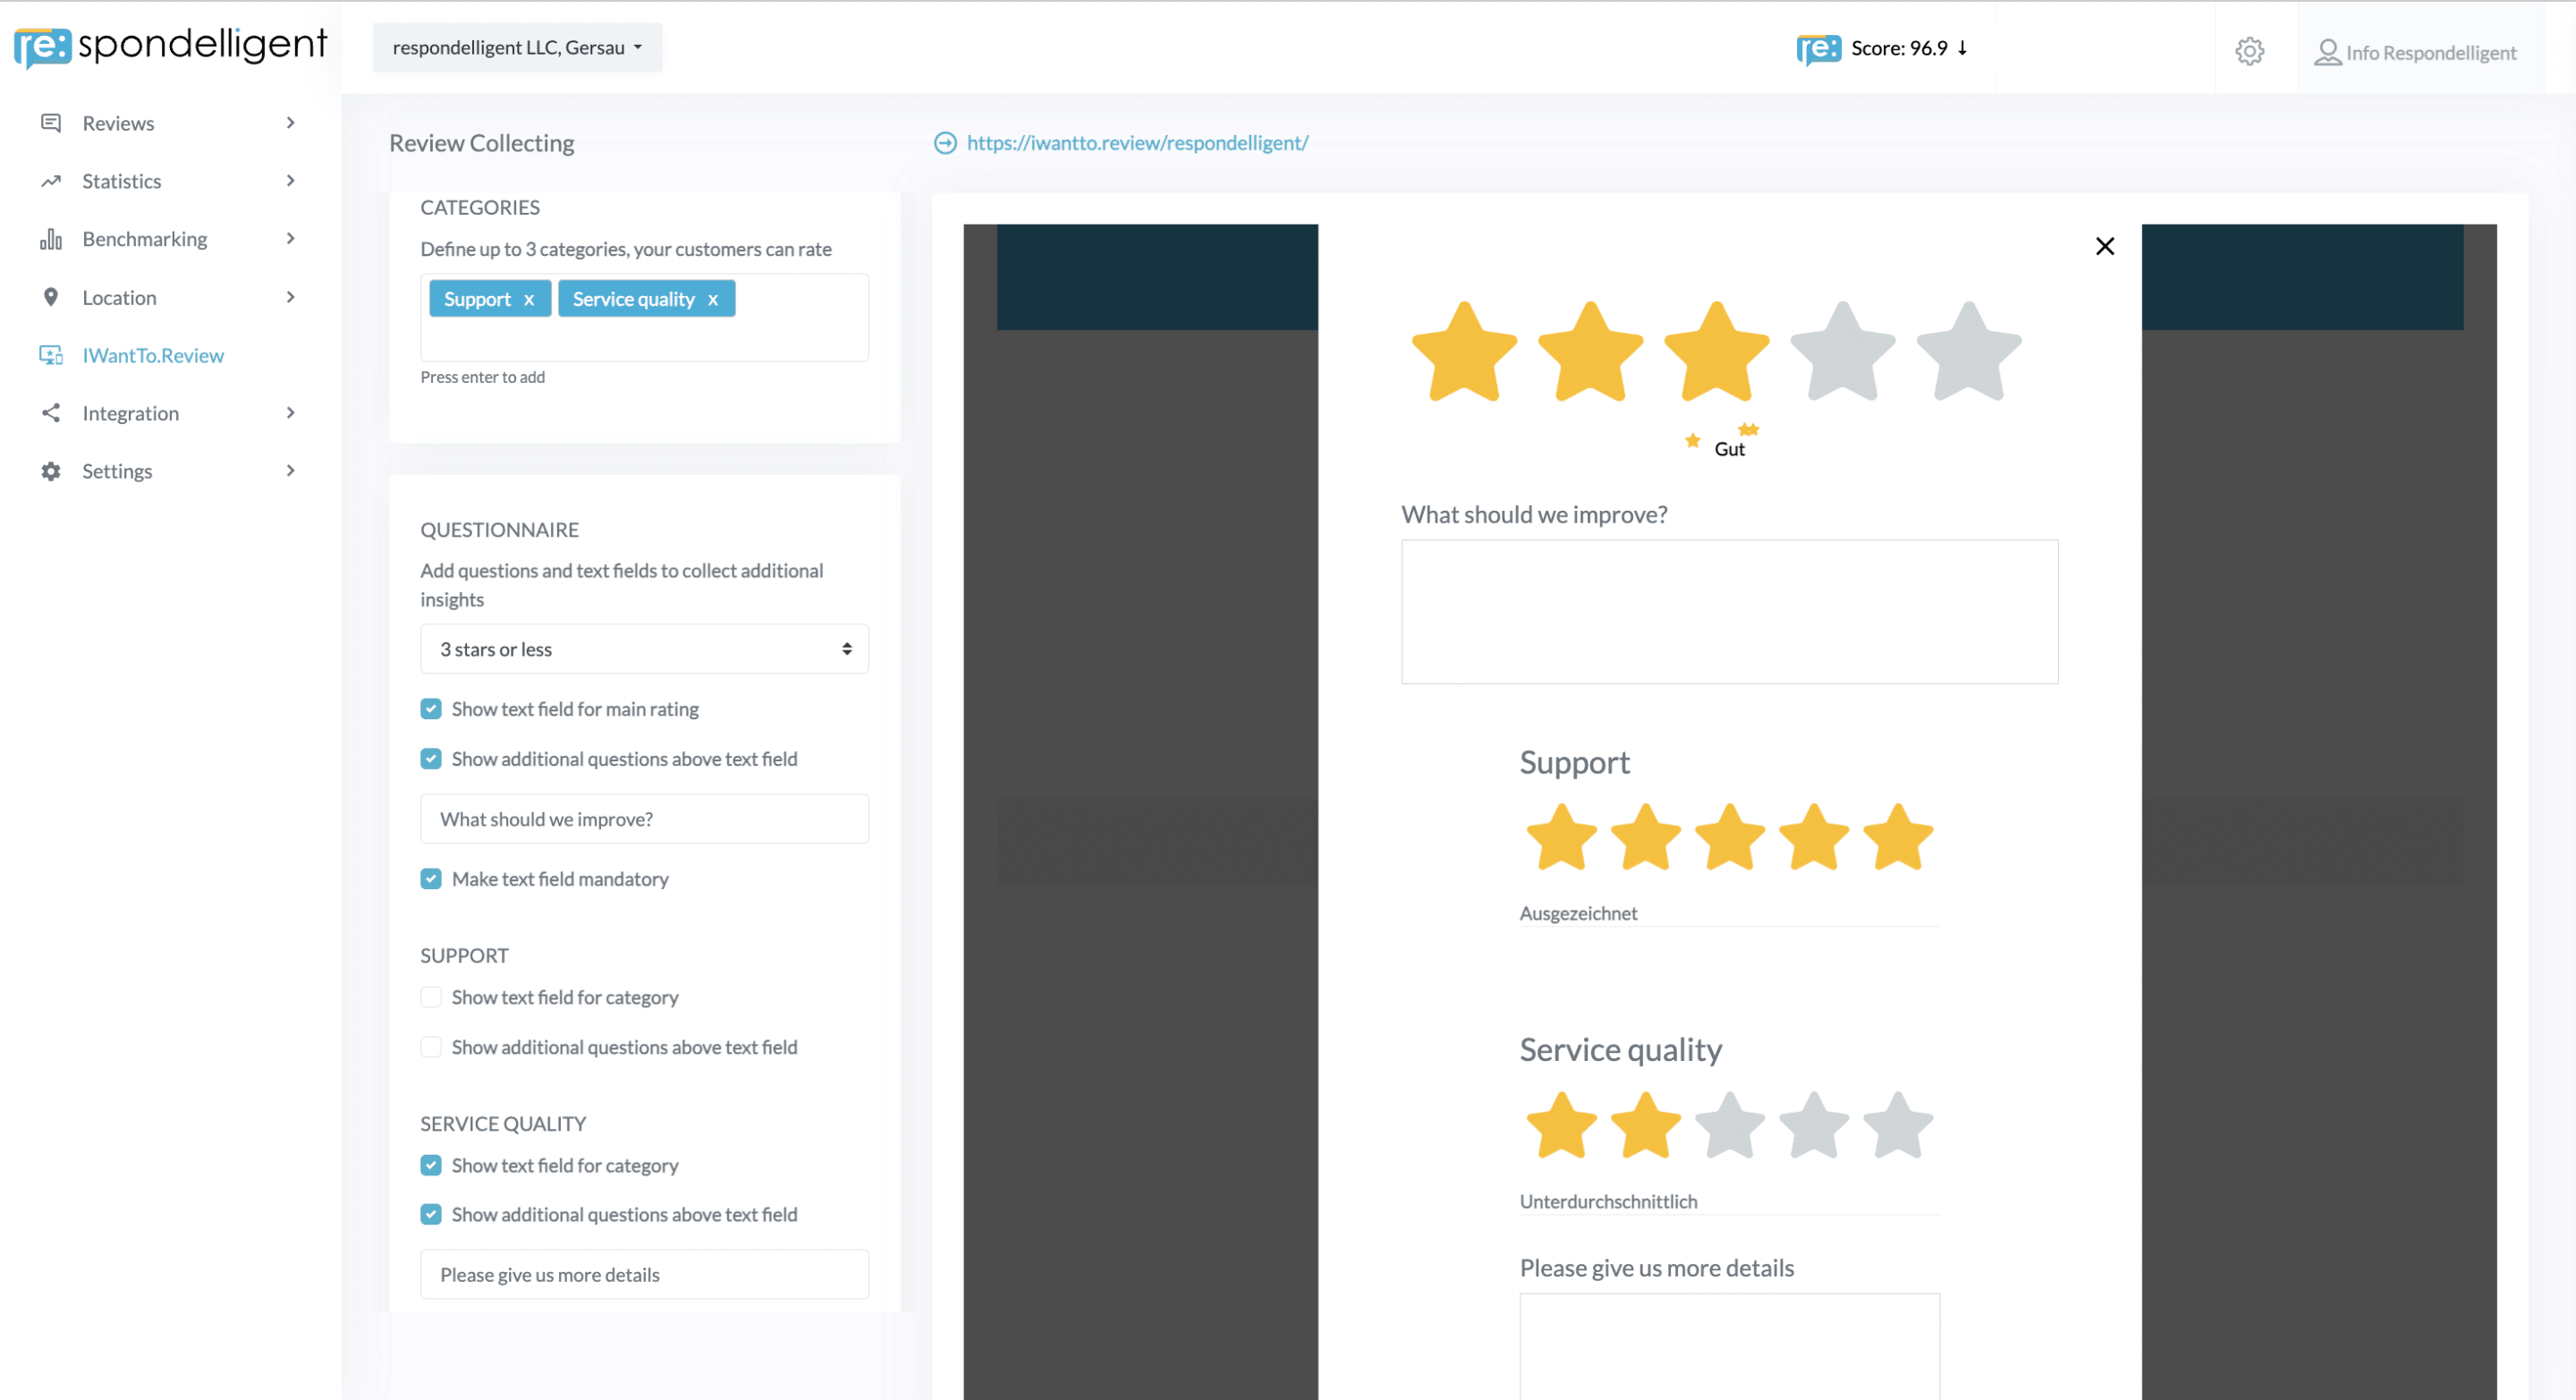
Adding a confirmation message and categories to your form is completely optional. You can skip this part if you don’t want to set it up.
6. IWantTo.Review feedback in the app
When guests start to rate your business using IWantTo.Review landing page, you will see two new Review sources: IWTR Rating and IWTR Form.
If you have set up a category, you will see the category and the rating under each review.

In IWTR Form, you will also see the details of the guests and their comments, so that you can contact them directly or address the feedback with your team.
7. Tracking
The URL of your landing page is not indexed. You can use it as it is in newsletters or on social media to ask your guests for feedback or make a QR code out of it.
We recommend tracking your review requests using UTM codes to find out where guests click on your link. You can create a new URL in Google’s Campaign URL Builder tool and add such parameters as campaign source, medium, or name.
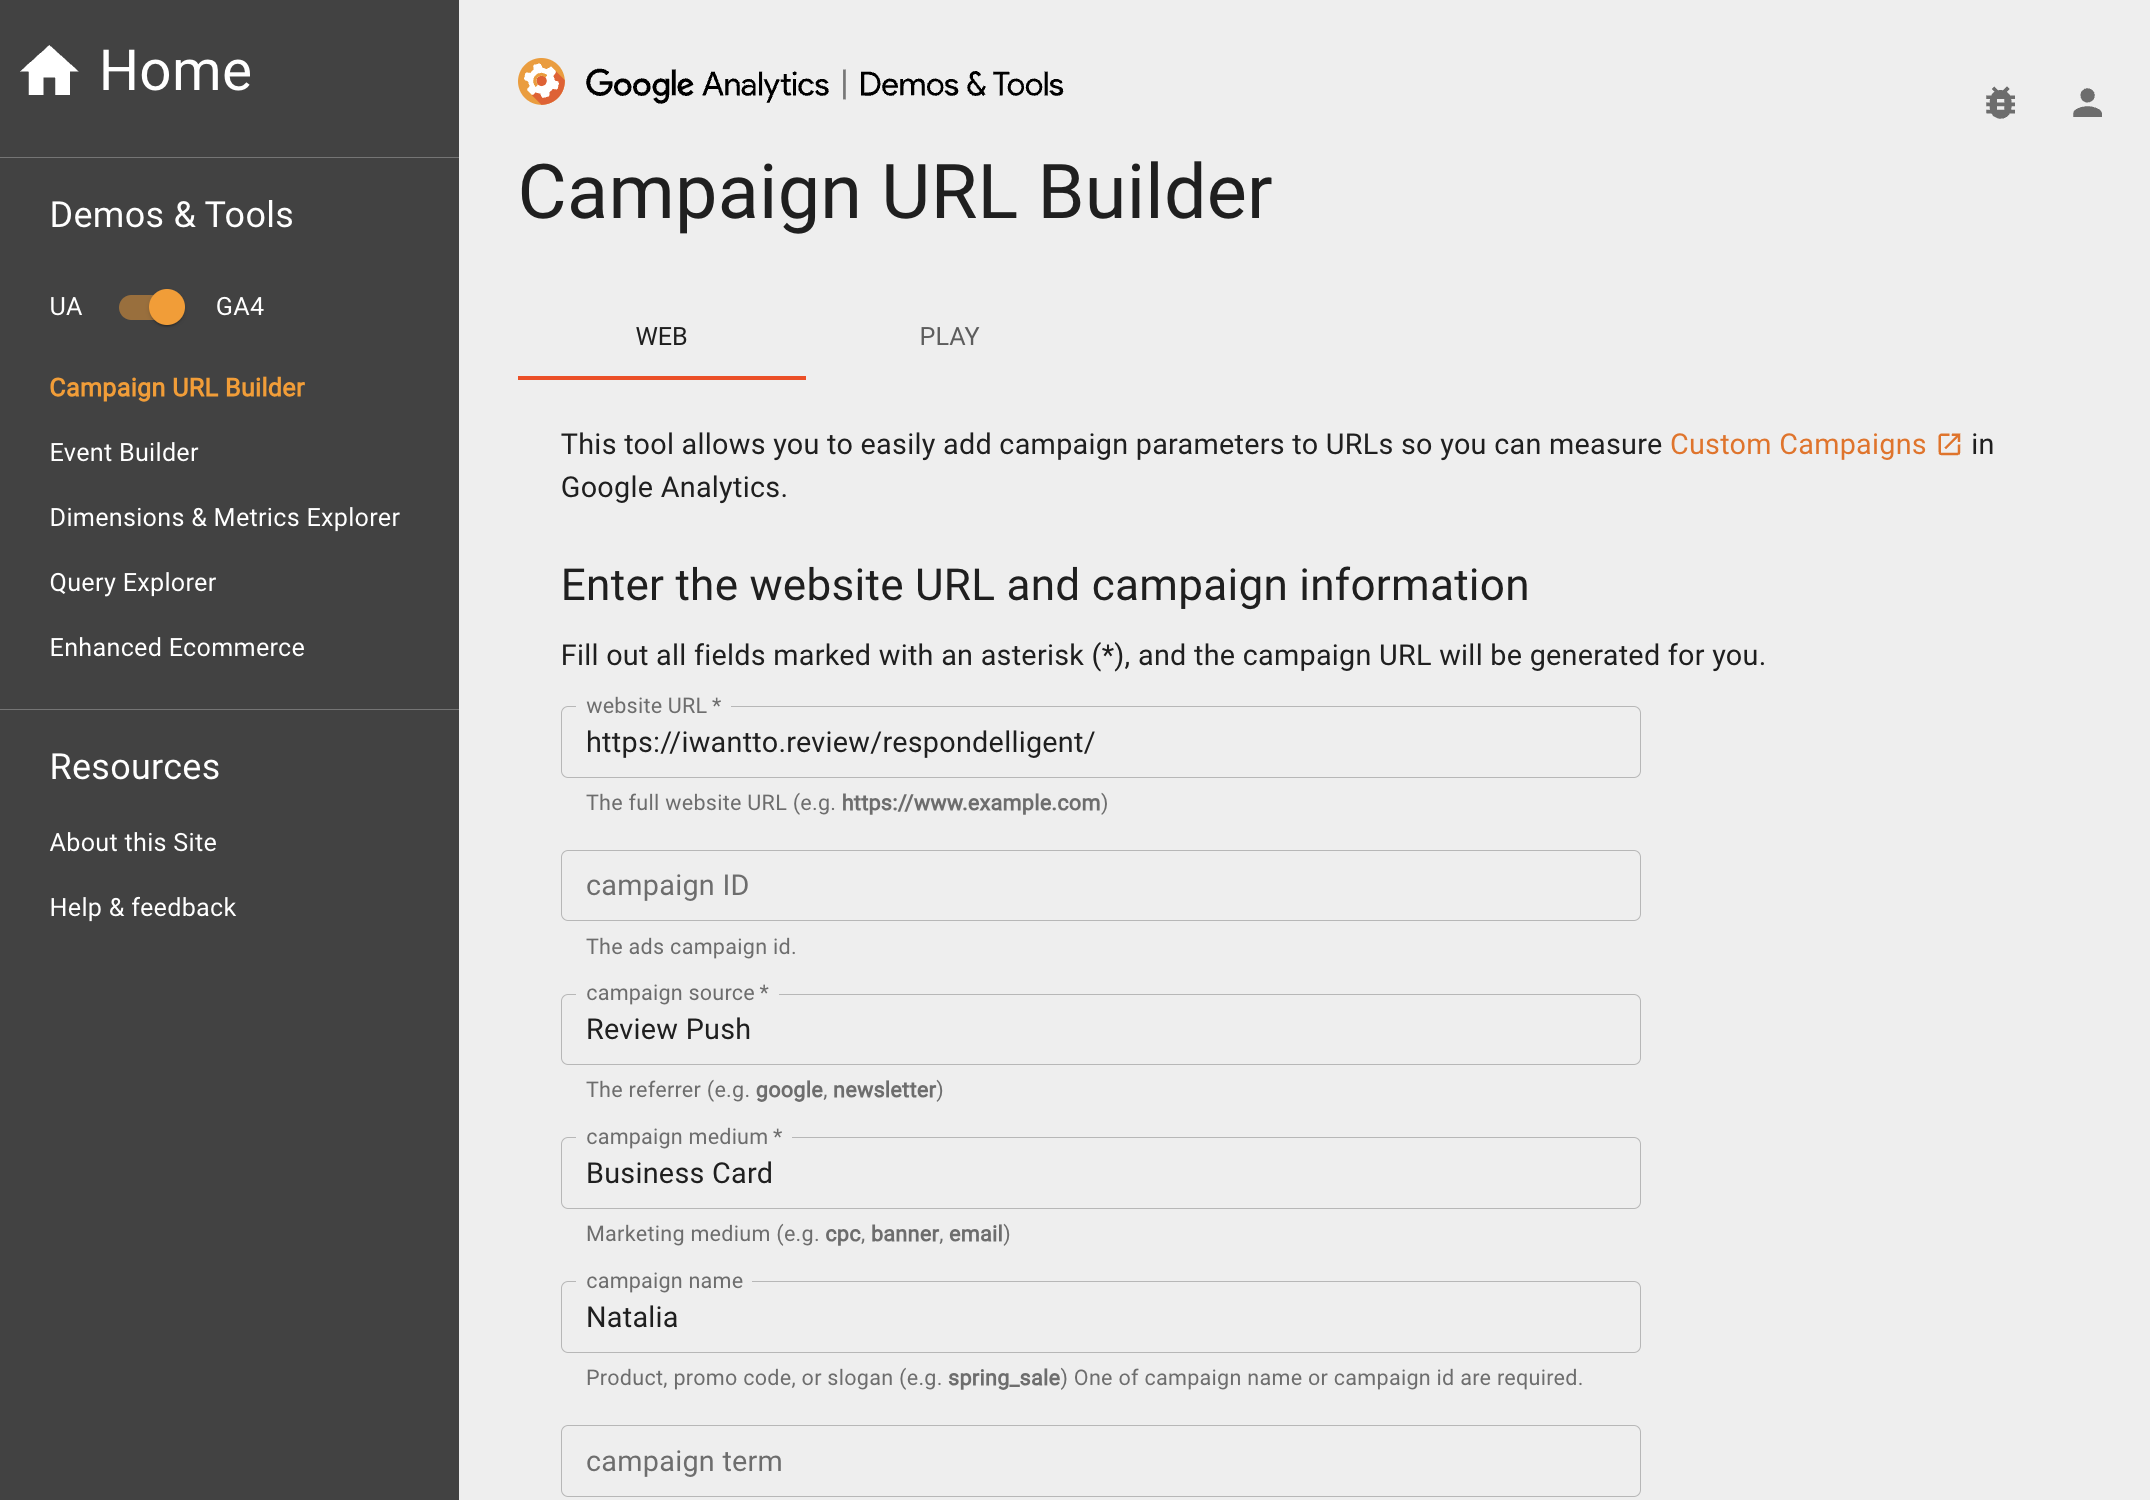
A longer URL will be created containing the parameters you filled in. Use this new URL to generate reviews.
In re:spondelligent app, we save the information coming from the UTM codes. You will see the data under IWTR Rating or IWTR Form.
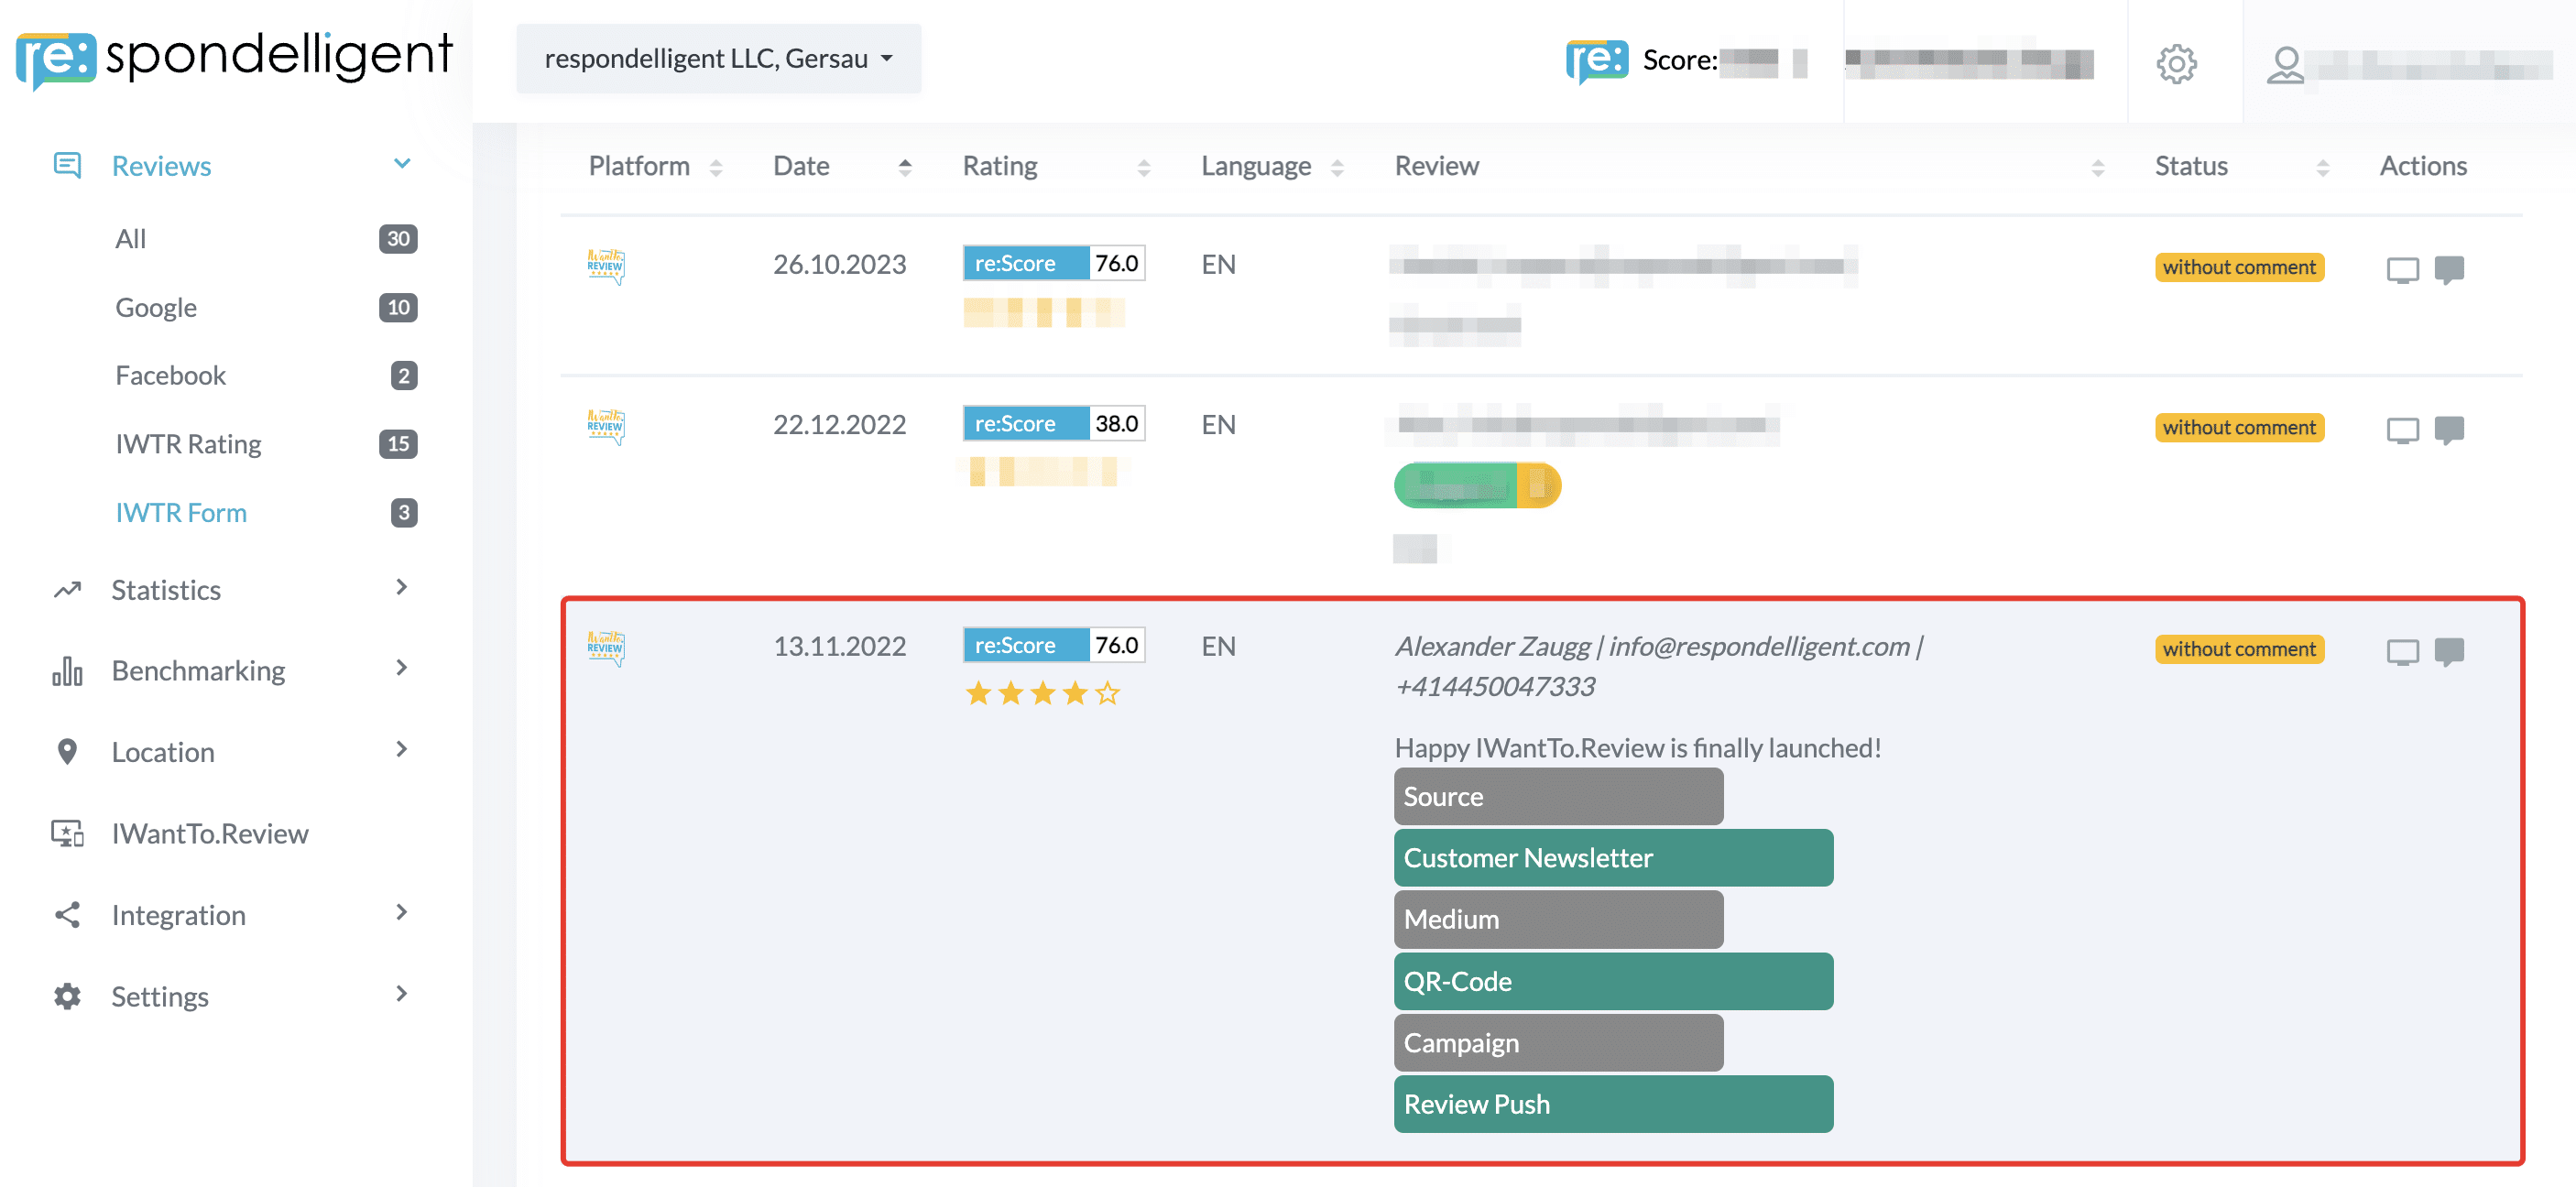
Thus, you can not only generate more reviews but also get more insights into the review behavior of your guests.
Would you like to collect data on the visitors to your IWantTo.Review page and use this data to create targeted marketing campaigns on Google and social media? Read about our integration with Google Analytics.

