
Response Template
At re:spondelligent, we provide different solutions to respond to reviews. These include our AI-powered solution and well-known Personal Assistant. For those who prefer to respond to online reviews themselves, we have developed a response templates feature that helps save a lot of time.
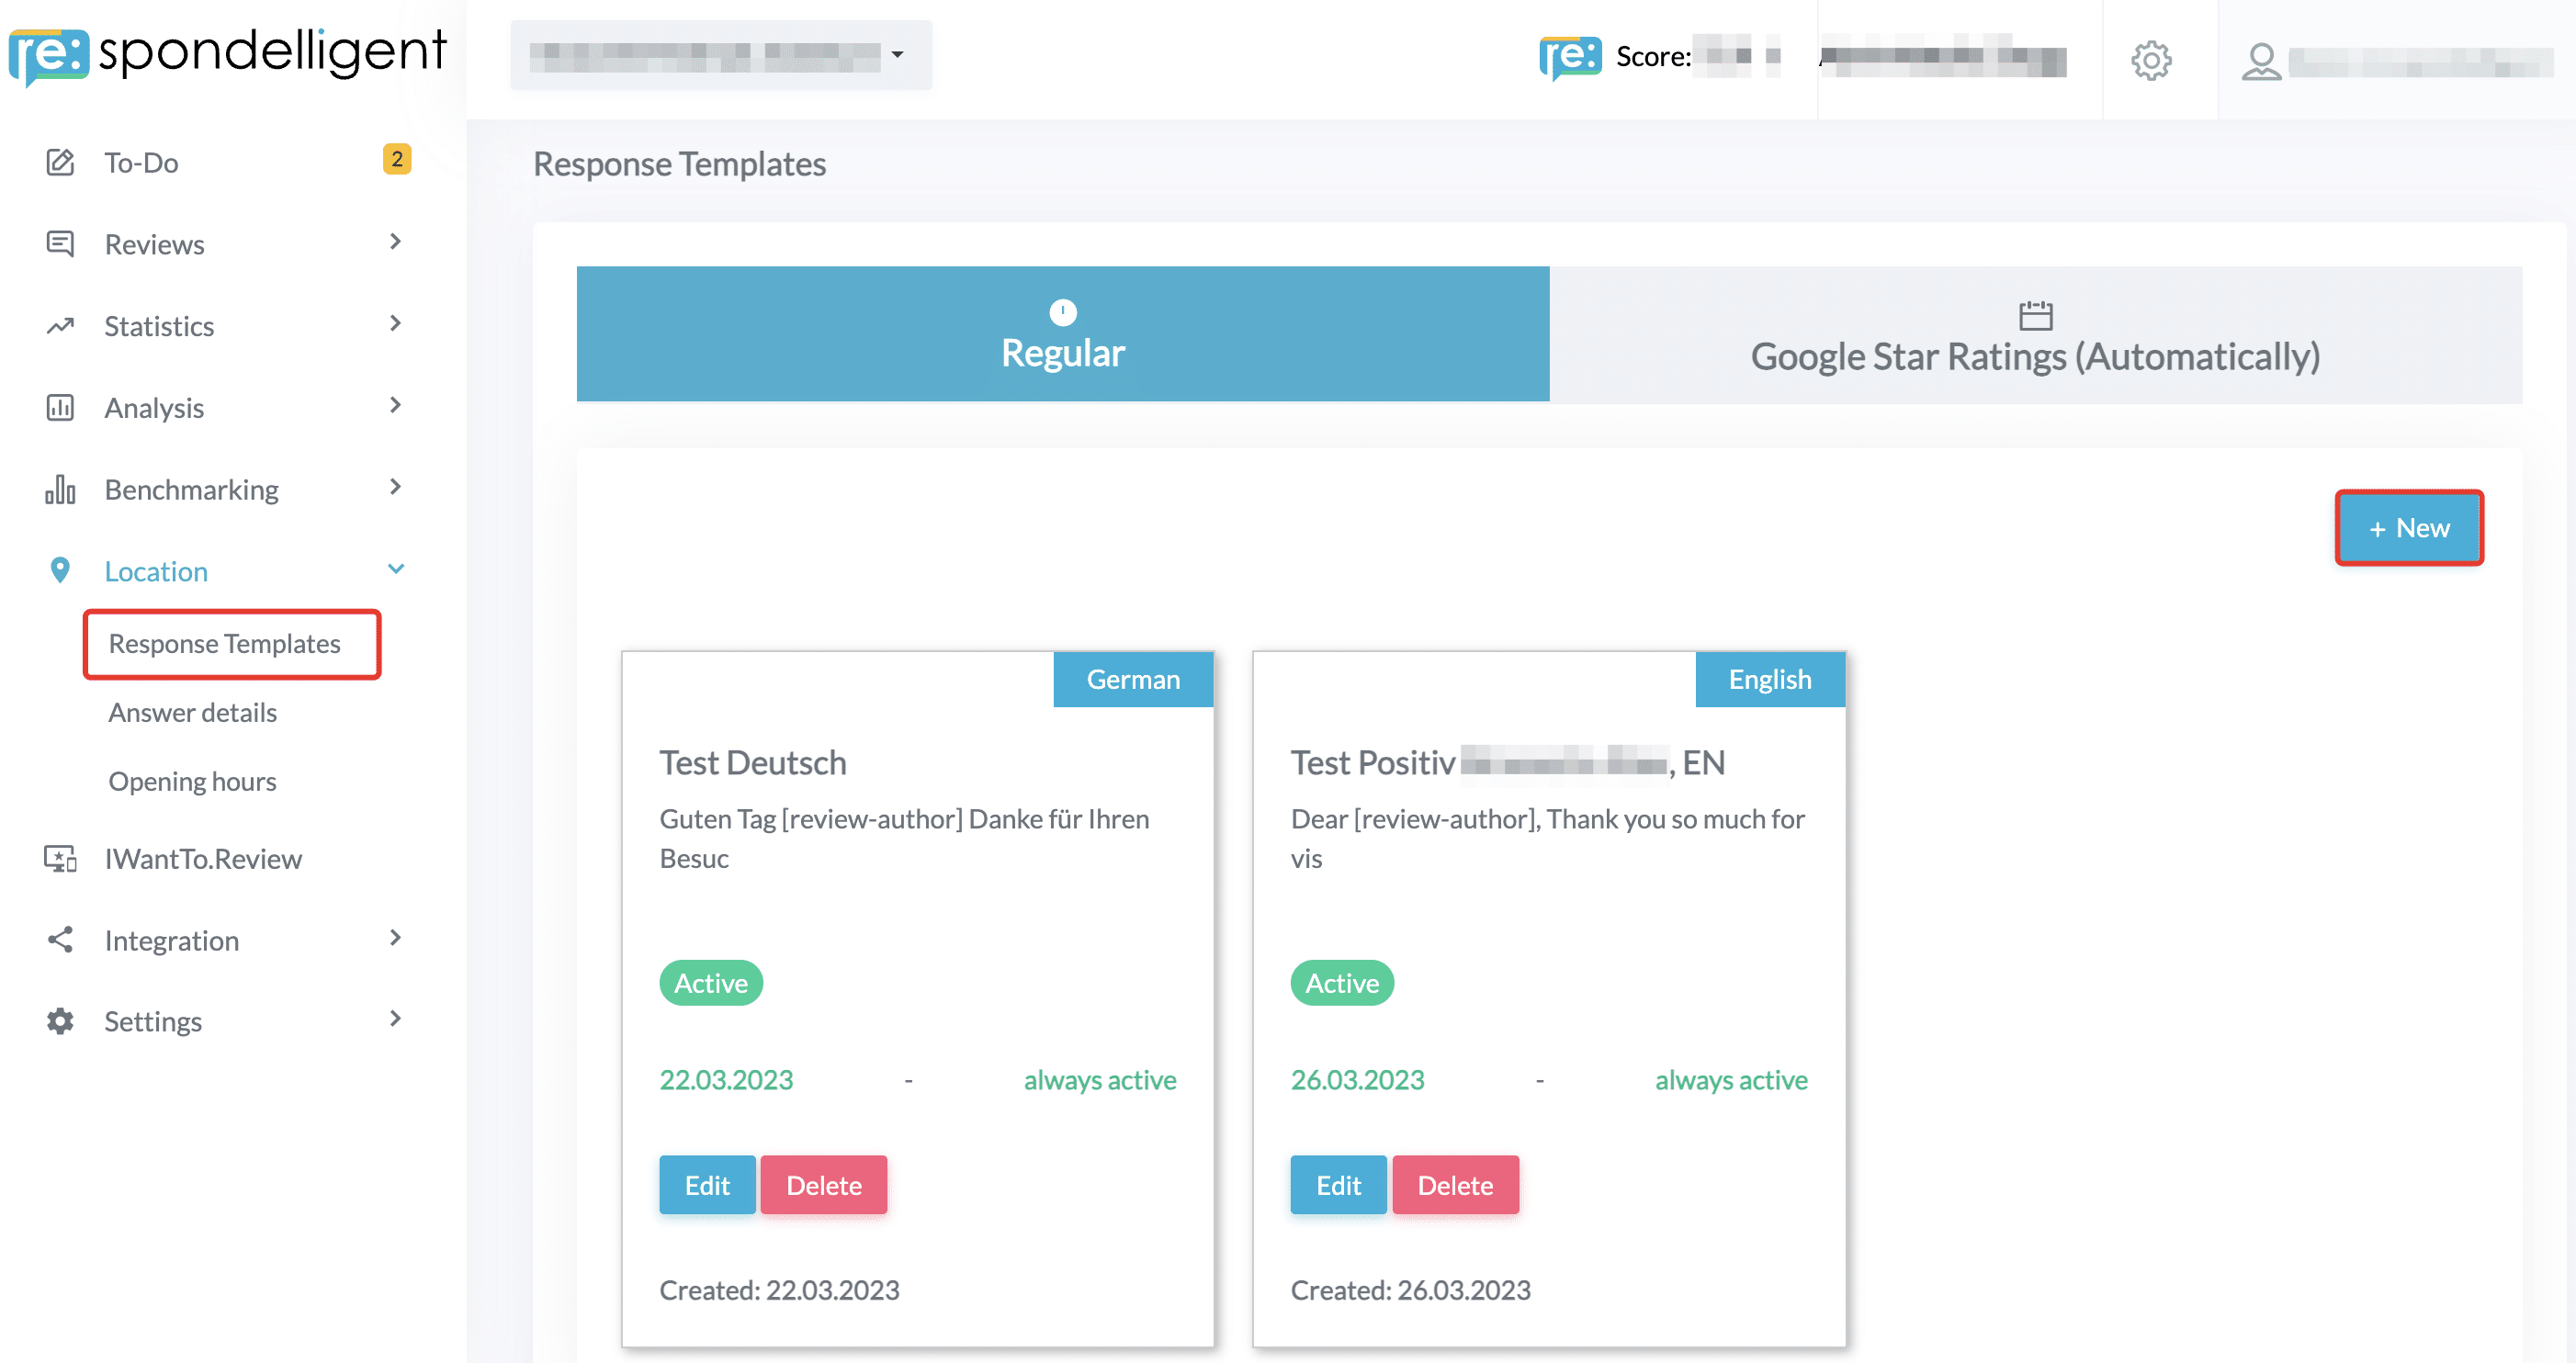
You can find Response Templates in the left-side menu under Location.
1. Regular templates
To add a new template, click on the Add New button on the right. A pop-up window will open where you can design your template.
First, give your template a recognizable name. It is important that you find it later when you have many different templates.
Then select the language of your template and write your response template. We have provided Template Text: placeholders for review author, company name, company city, platform name, and nickname*. These placeholders will be filled dynamically for each review, and you can add them to our text by clicking on them. For example, [review-author] will be later substituted by the username of the review author.
*Nickname is the name you would like to use to sign off your response. You can change it in your Settings (click on your user name in the top right corner). If it is left blank, your full name is used in the template.
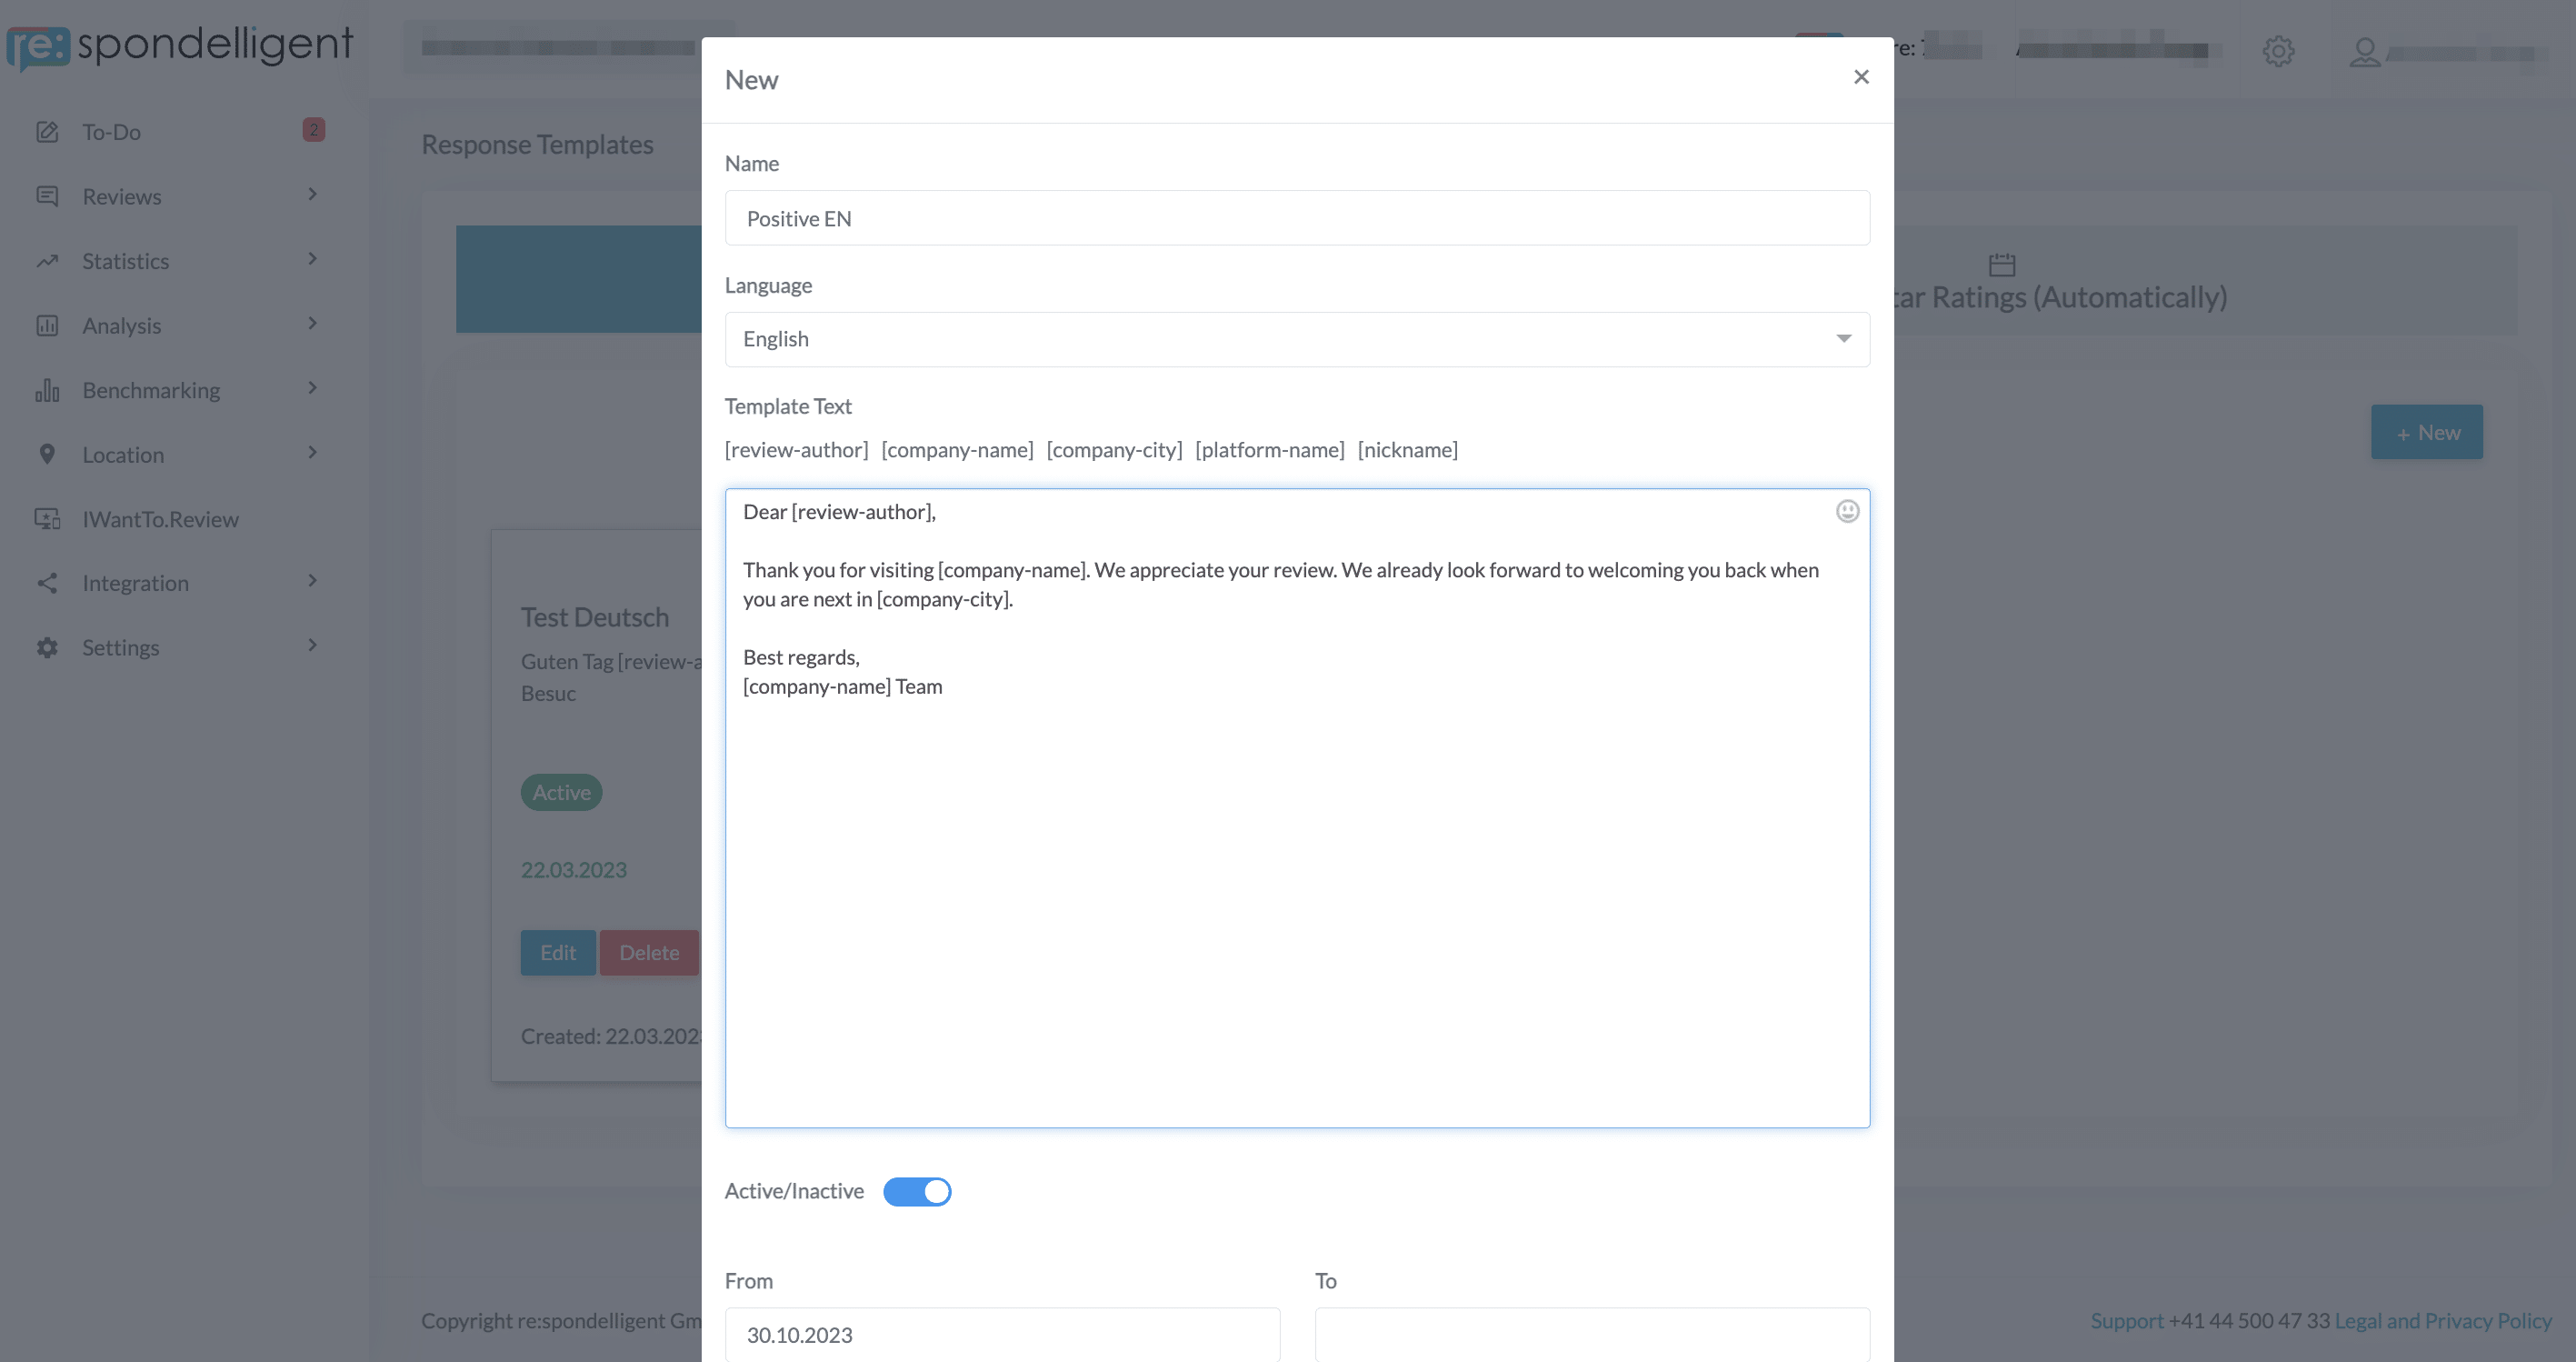
You can set your template to active or inactive, in case you want to use it at a later point. Additionally, you can set the time span when this template should be available. For example, you can create a special template only for a holiday season. The first date is by default the day when you create the template. If you leave the end date open, the template will always be active.
You can apply your template to multiple locations. This is very helpful if you manage different locations that need the same content for their responses. In the Apply for section, you can select single locations or click on All if you would like to apply the template to all the locations that you manage.
After you have finished designing your template, save it, and it will appear in your dashboard. You can edit or delete your template at any time.
2. Apply templates
To apply your template, go to the Reviews on the left-side menu. Choose the platform and the review that you would like to respond to. In Actions, click on Compose and Publish Response. A pop-up window will open where you write your response or add a saved template. First, choose the language of the template. Then you will see only the templates in this language. Choose the template from the drop-down list, and it will appear in the text field below.
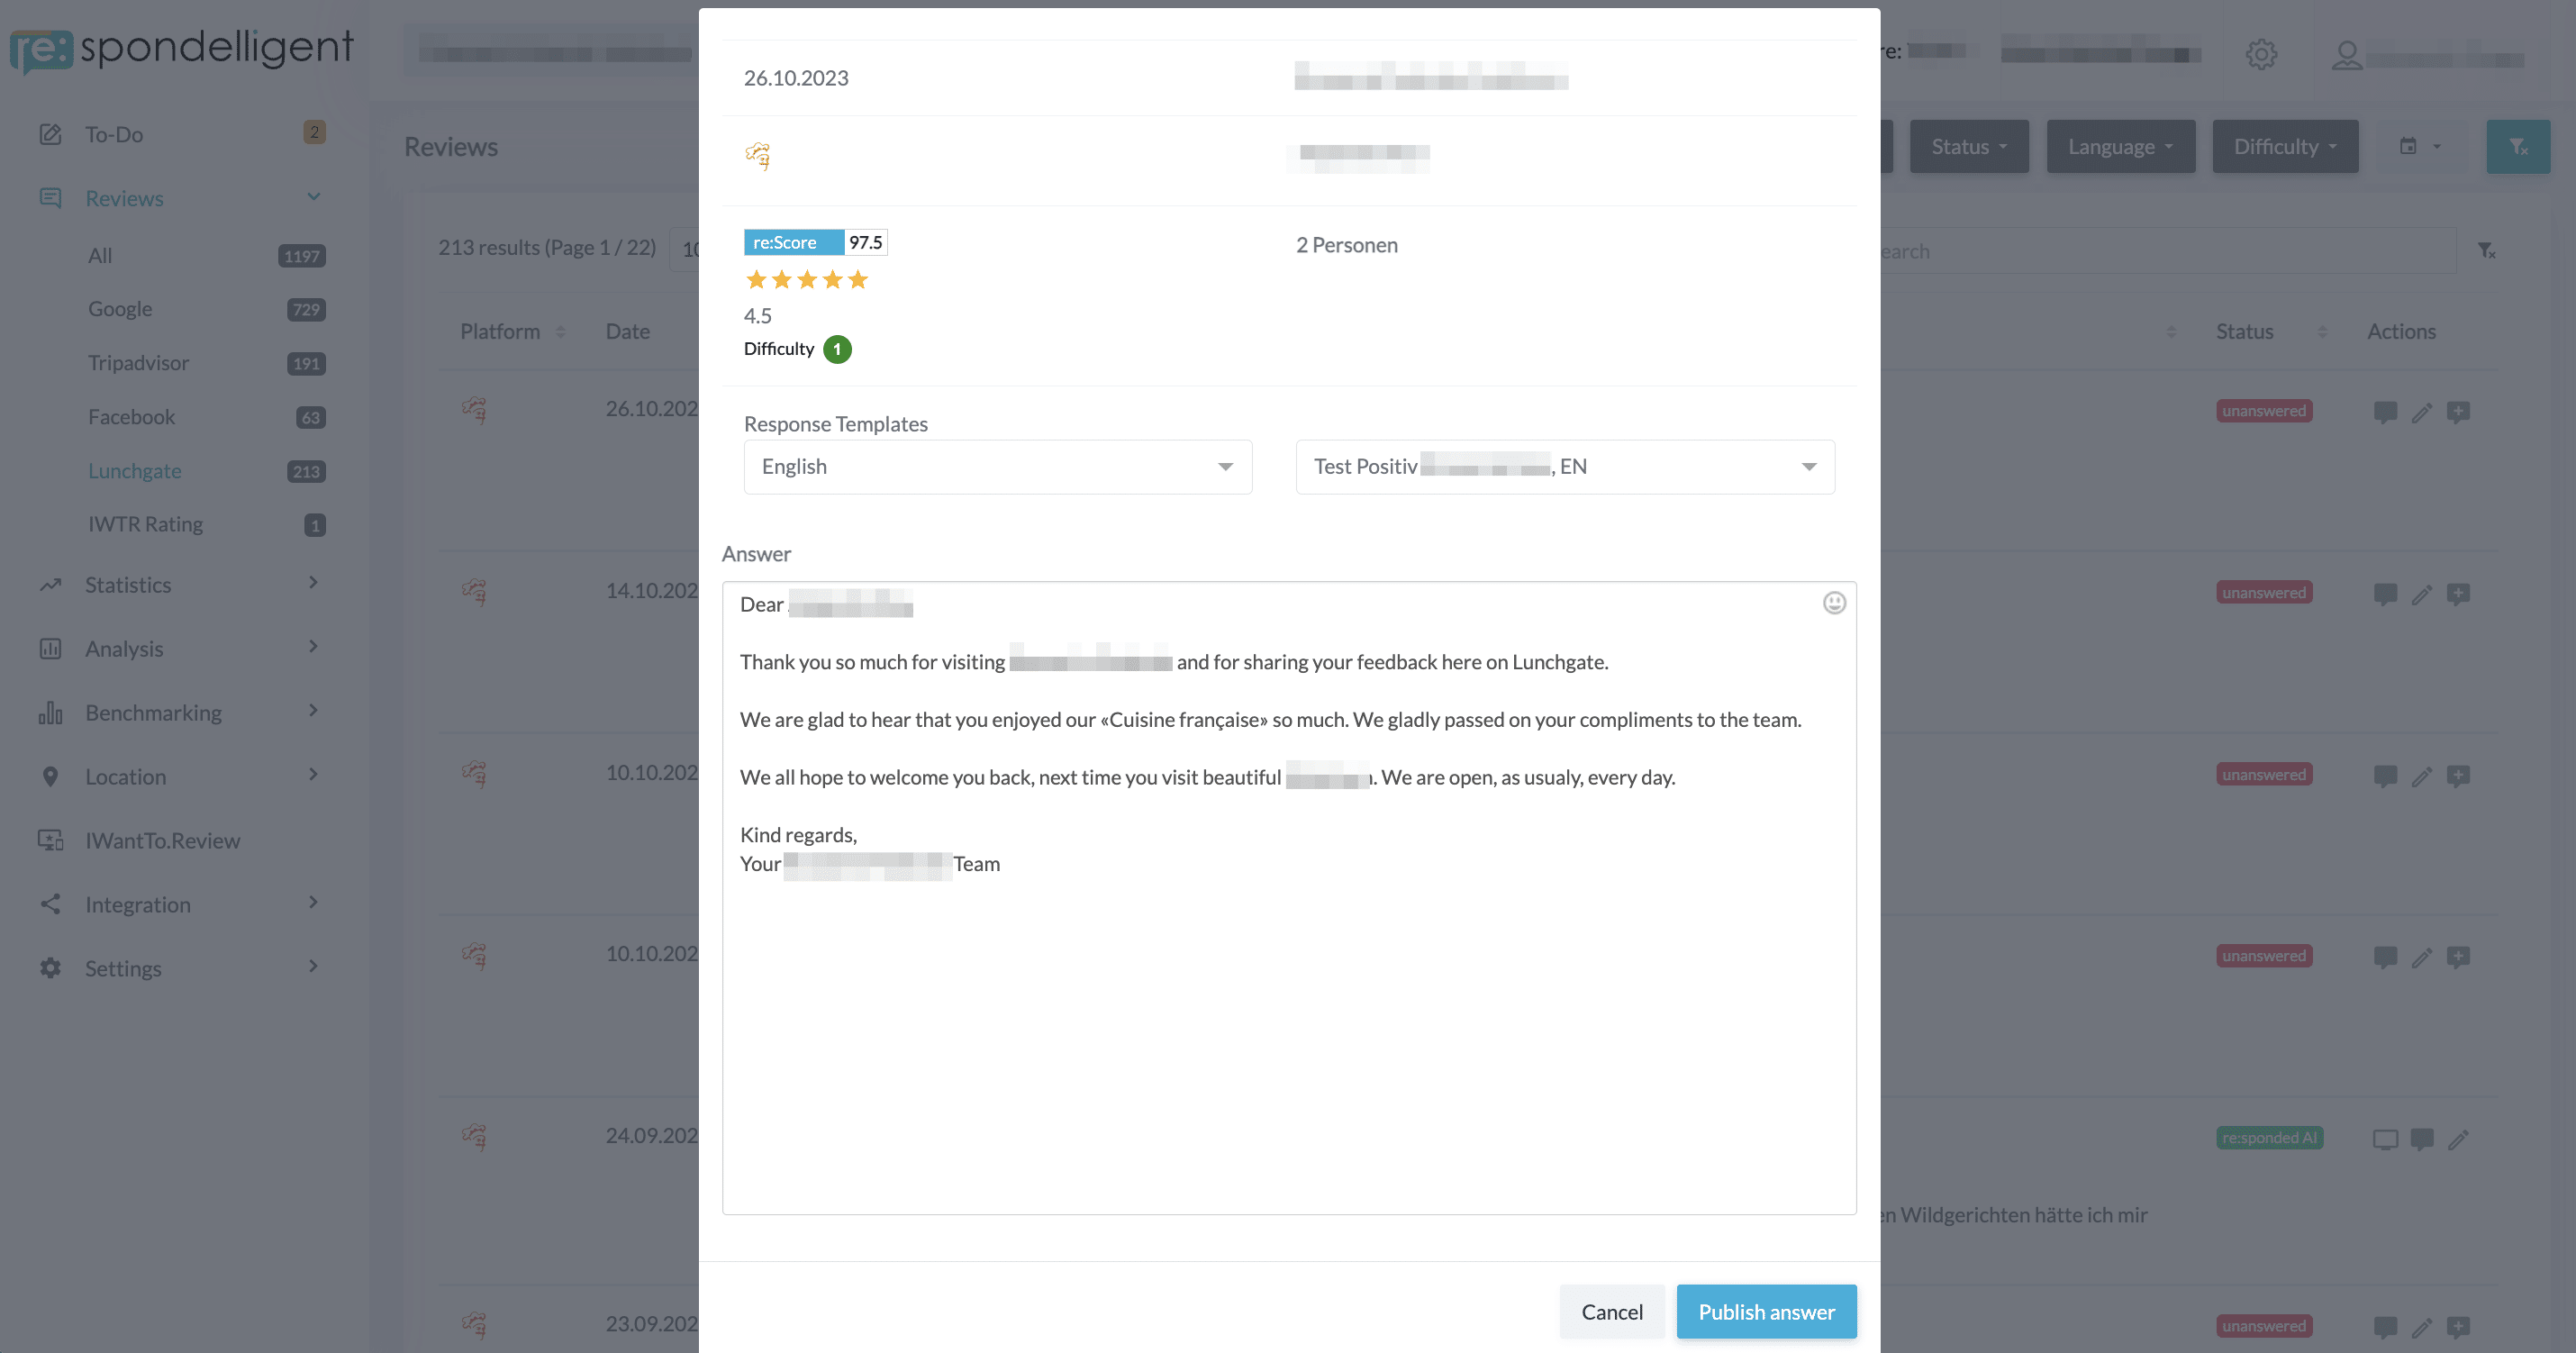
As you will see, the placeholders are automatically filled in, and the response is ready to be published.
We recommend saving several types of templates for different situations, for example, positive and negative reviews.
3. Google star ratings
These templates look similar to the Regular templates. The difference is that you set them up for pure star ratings on Google, and the templates will be published automatically.
To create such a template, click on the Add New button on the right. A pop-up window will open where you can design your template.
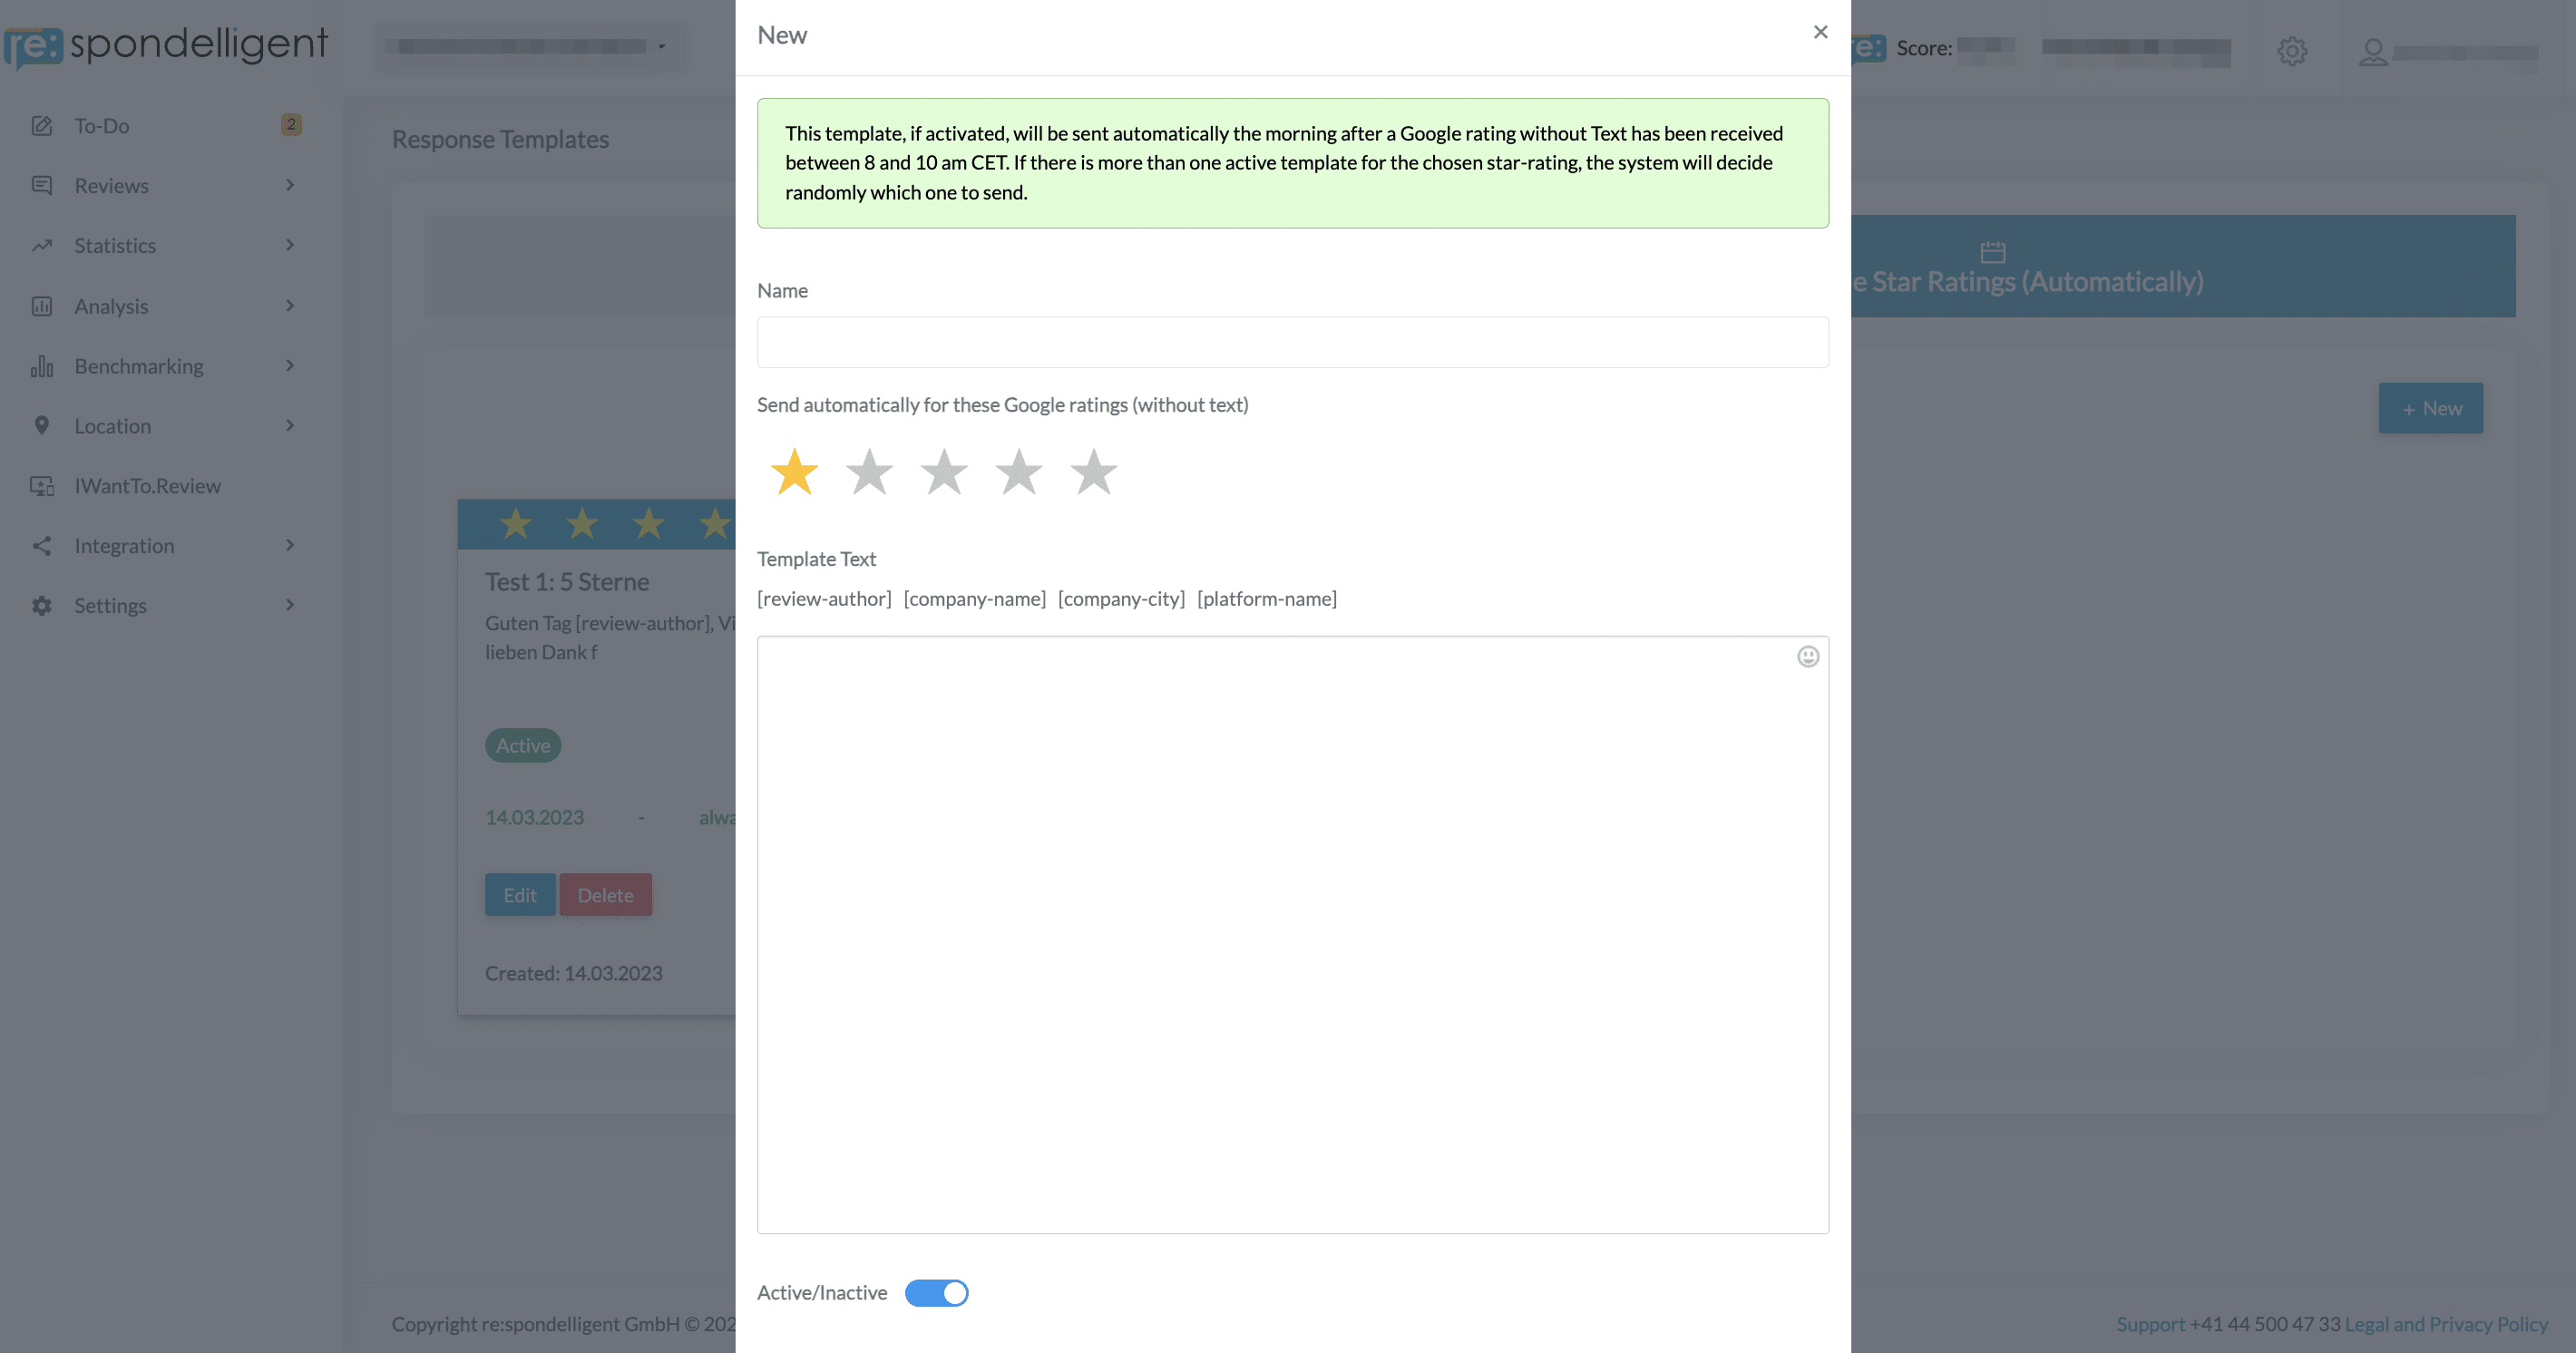
On the top, you can see a highlighted message explaining when the template is triggered. If a new pure star rating is published on Google, this template will be used the next day between 8 a.m. and 10 a.m. CET, and the response will be published automatically.
Define the name of your template, choose the star rating for which this template should be triggered, and write your template in the text field below.
Tip Create several templates. If you have several templates for the same star rating, the system will choose randomly which template to use, this will ensure variety in your responses.
As in the Regular Templates, here you can also set your template to Active or Inactive, change the date, and apply your template for several locations.
Don’t forget to save the changes. Now you are all set. The new pure star ratings on Google will be responded to automatically.